This boat belonged to my father and after he passed away it became mine. The year was 2002 and the port engine had a leak in the block and the fuel tank was leaking. So we pulled her out and I began taking engine and fuel tank out. That same month my wife gave birth to our first child and I was also recently promoted. Needless to say other things became a priority. Now fast forward 12 years, another kid and 2 more promotions and I finally am starting to have time, $$$, and the drive to start this project and most importantly the bosses endorsement. The interior concerns me. I have not dove in there and removed anything else since 2002 so I don't know what awaits. After some research I can only imagine what everything below decks looks like. I have never done any type of boat restoration or fiberglass work. I have recently signed up on a couple of boat forums and have been watching and following several restorations learning a lot. I have been researching and planning for the past month or so and getting the garage ready for this project. My wife or more befitting the nautical theme, The Admiral has endorsed the project and is even willing to pitch in where and when she can. The funds have been set aside so next month I will rehab the trailer enough to get the boat from my moms house to its new home where all the fun will begin. This is what she looked like after sitting in my moms yard for 12 years.
The premier site for owners of the famous 233.
Restoration of my 1972 Formula 233 with twin Merc 165hp. Started on July 2014.
72 Thunderbird Formula w/twin 165hp Mercs
Views: 2287
- Attachments:

Replies to This Discussion
-
Permalink Reply by Mark A on
-
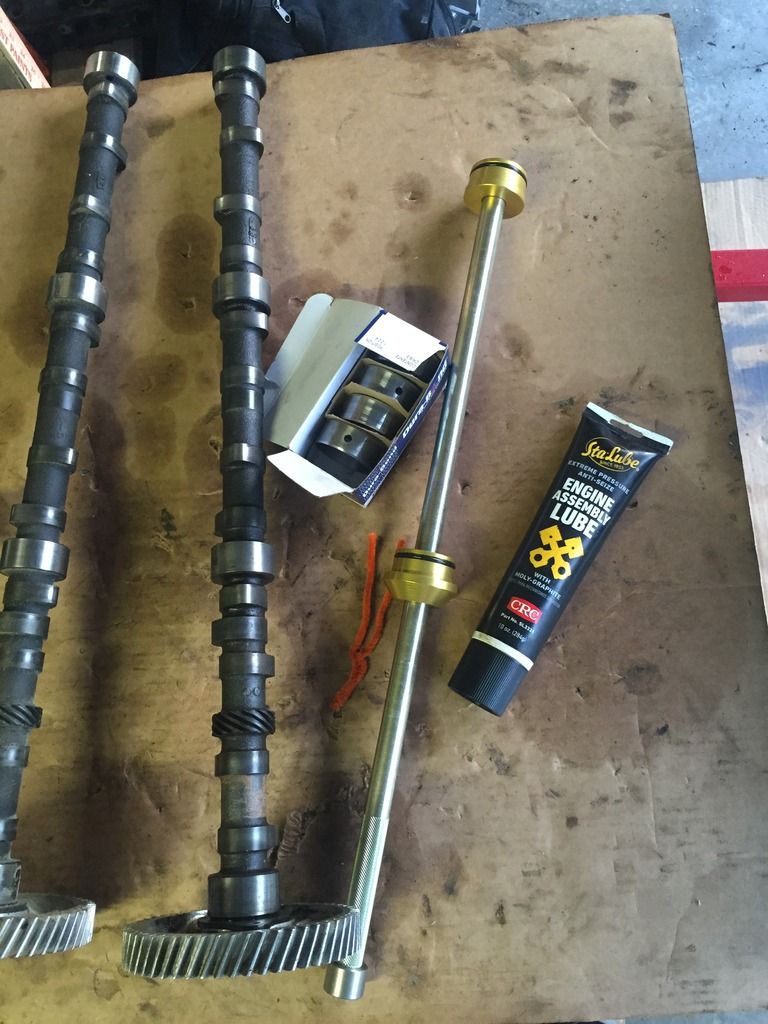
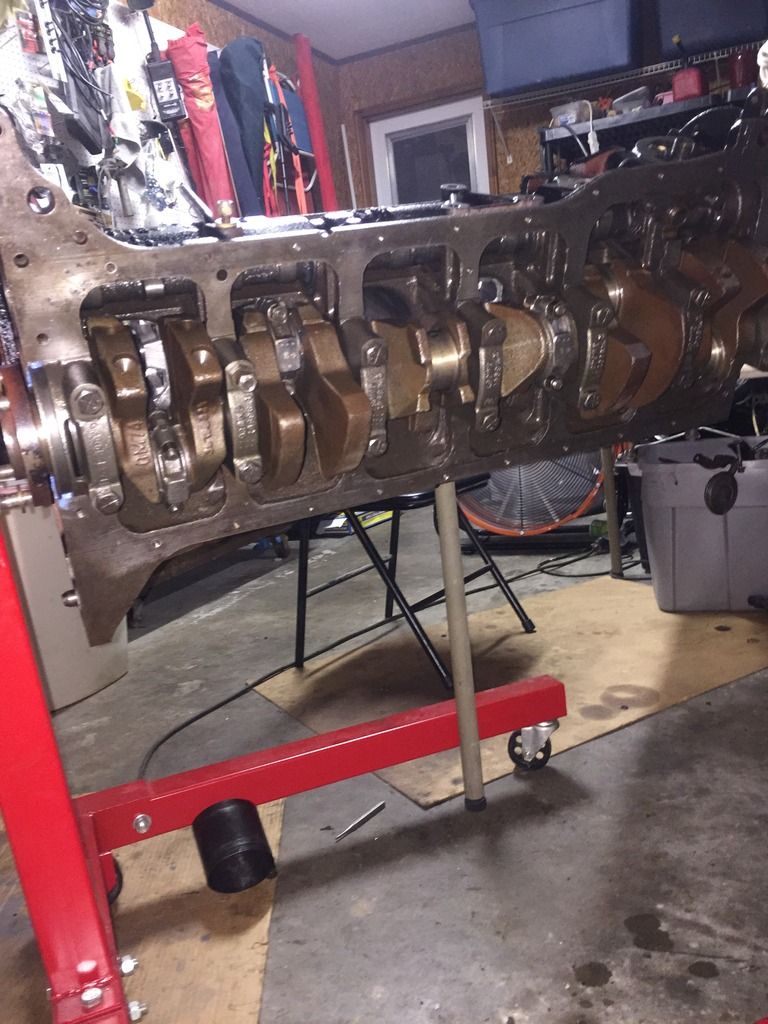
Still working on cleaning engine and associated parts. Inventorying what I have or don't have and trying to find parts from where I stored them back in July of last year. I got the block cleaned and ready for rebuilding. The bearing install tool showed up and I am ready to get greasy.

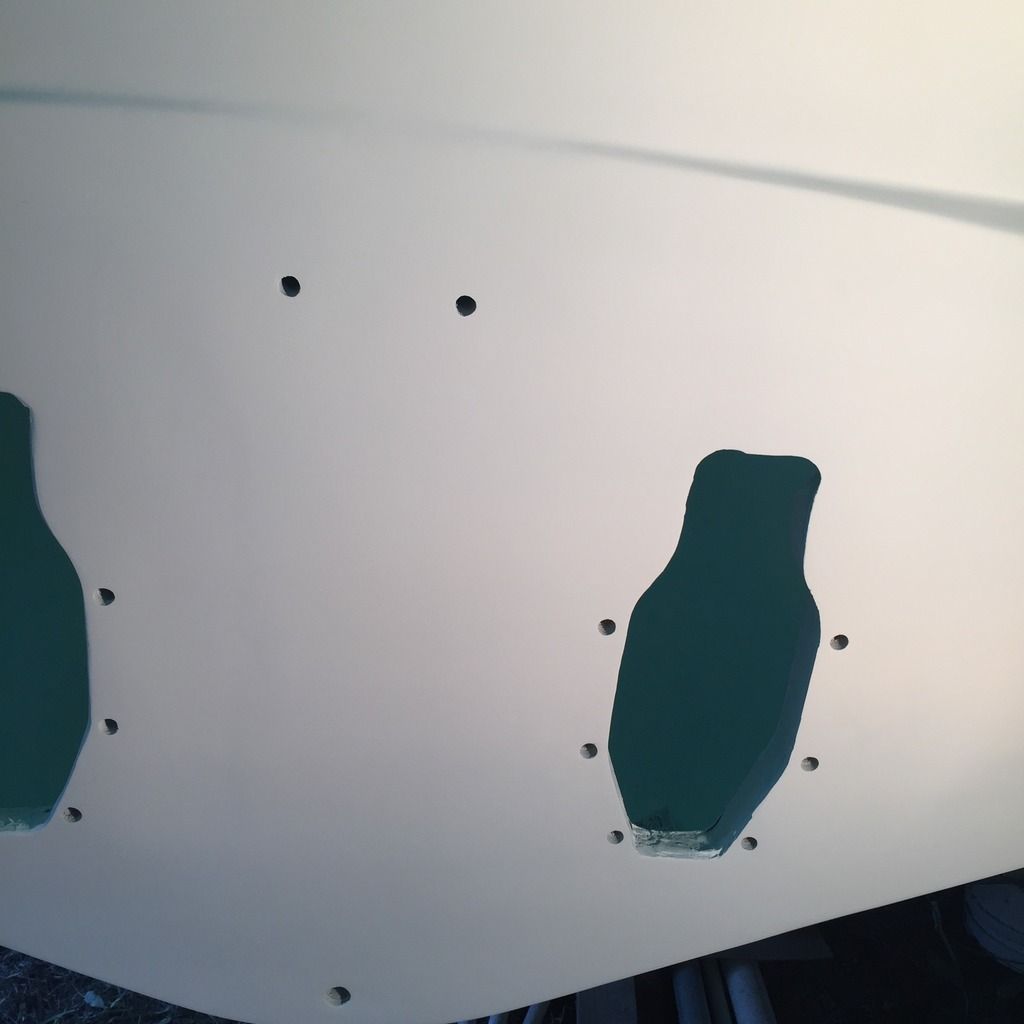
I am still working on the transom as well. I test fitted both Gimbals making sure my bolt holes are good and how bad the depressions are in the outer transom skin.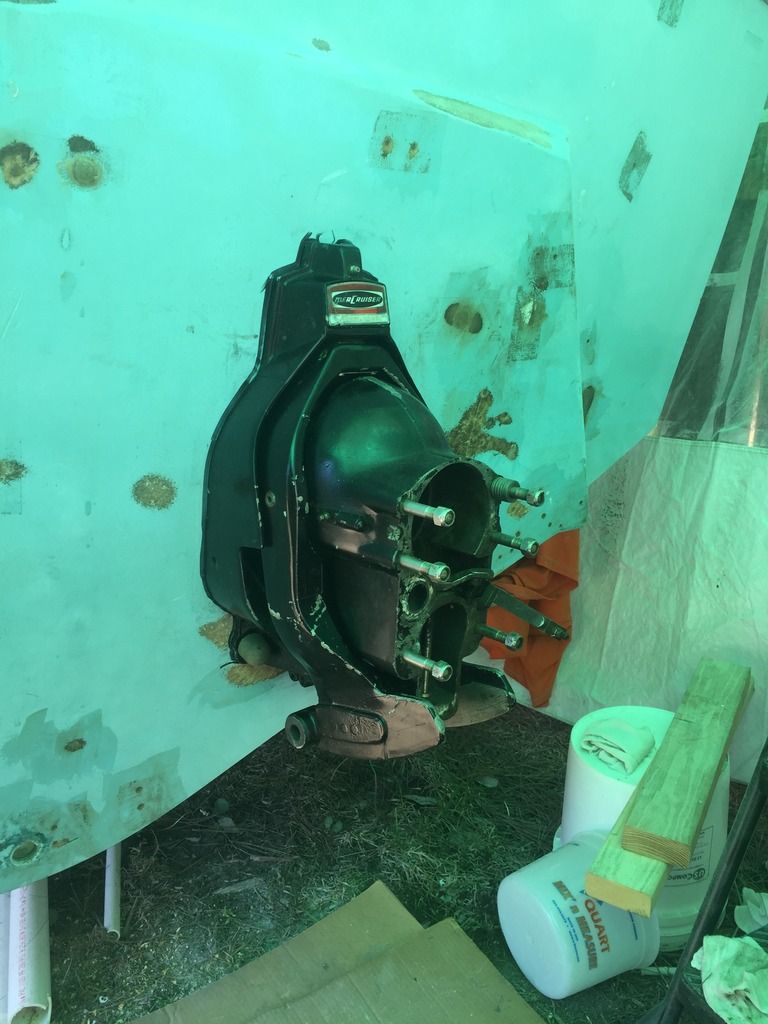
In this picture I took a straight flat edge and used a marked drawing lines vertical and horizontal where its not flat the lines begin and end where it is flat. The deepest depressions are on the Port side and are about 1/8" to almost 3/8".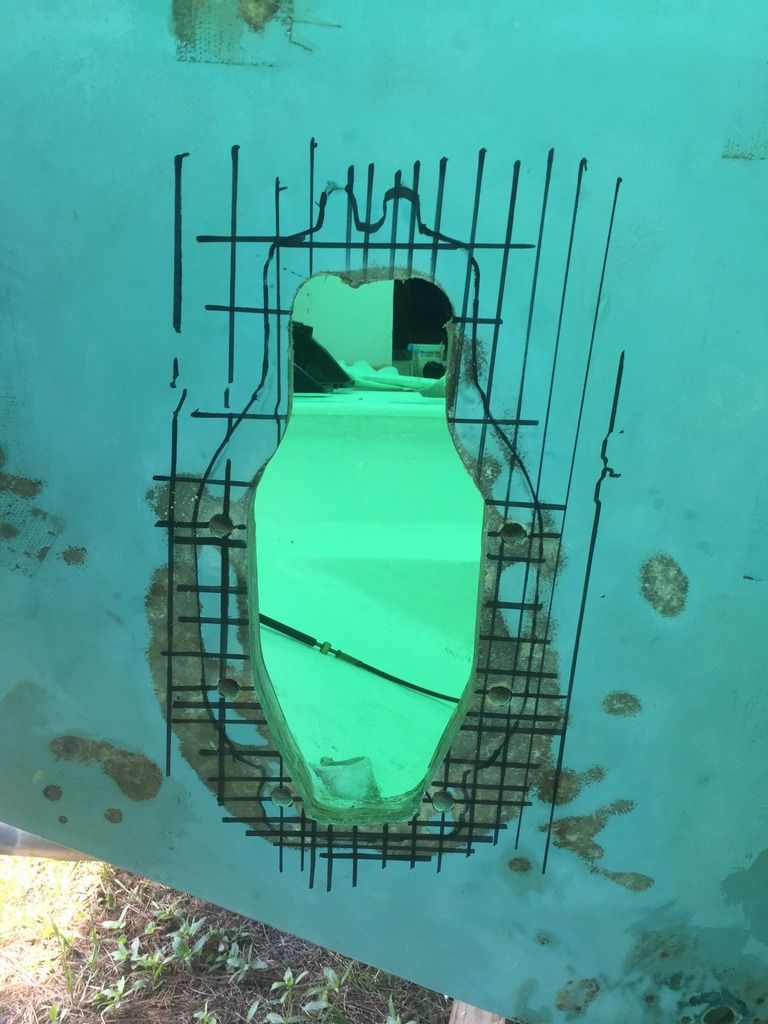


-
-
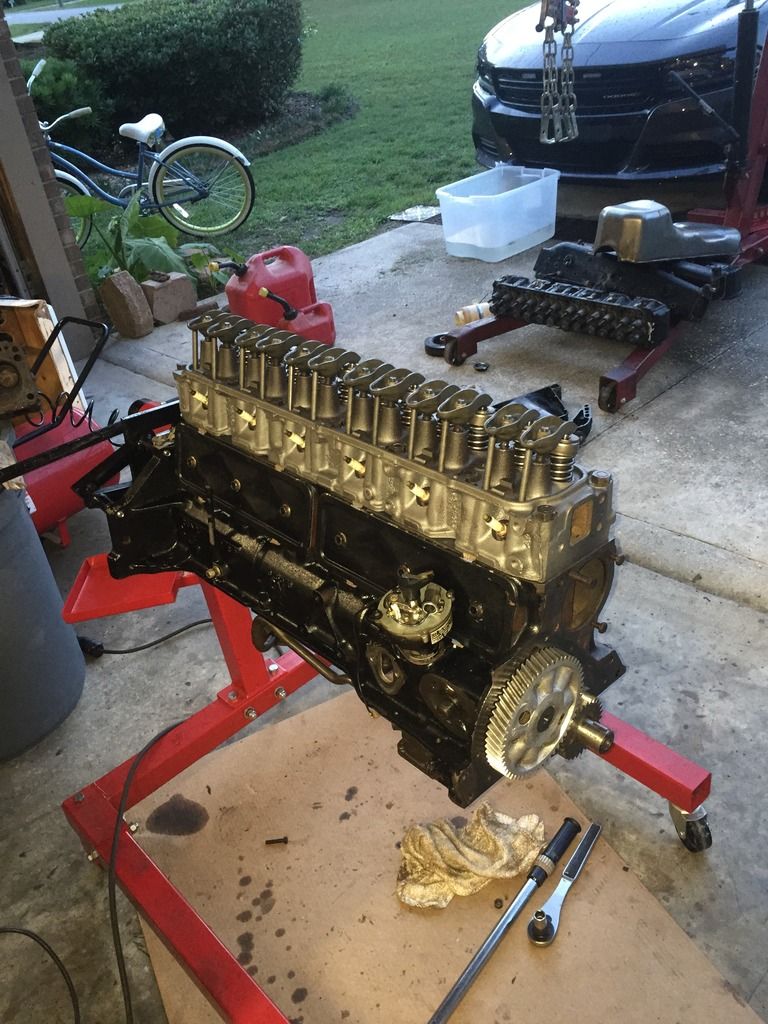
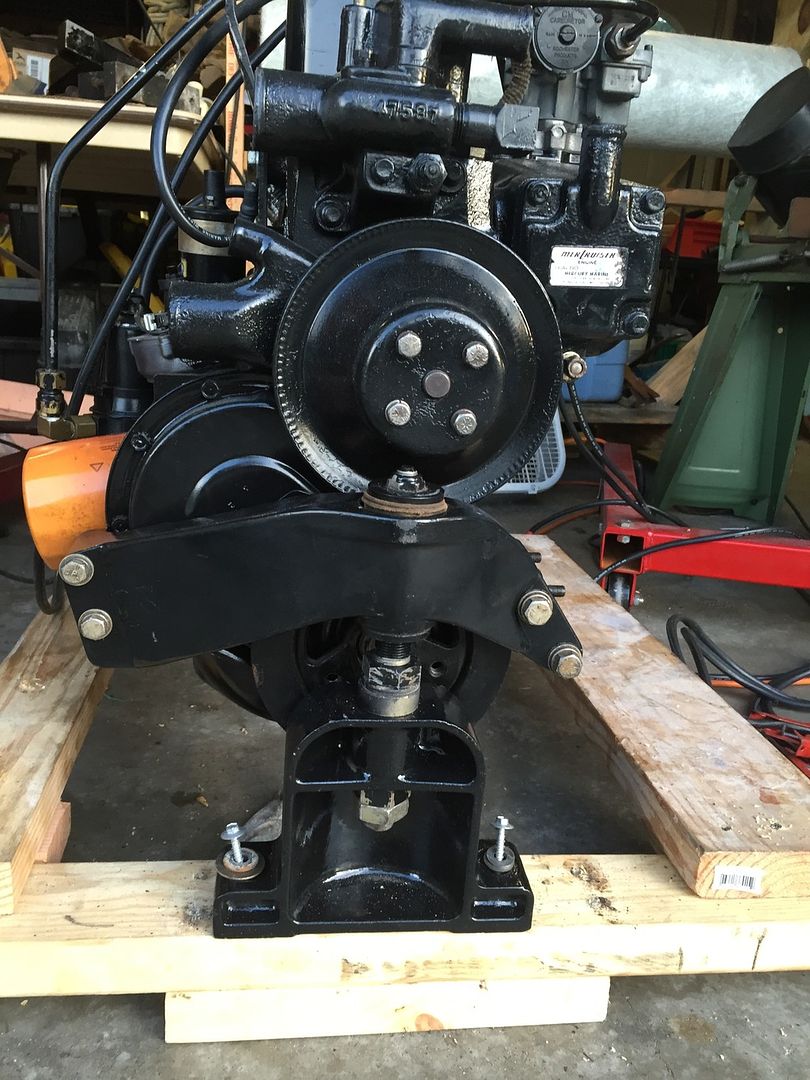
Last night after work I started rebuilding one of the engines. I had already deglazed the cylinders and cleaned everything up with a degreaser, pressure washer and soap & water. Then I dried everything with an air hose. Next was cam bearings installed and the cam. After that the crankshaft was cleaned up and installed with new bearings and main seal. The pistons I had already cleaned up and cleared all the grooves. I installed the new piston rings which was fun, then installed all 6 pistons with surprisingly few issues testing the crankshaft rotation as each was installed and the connecting rod caps with new bearing tightened down. All six pistons in and still rotates easily by hand. Took the oil pump apart for inspection and new gasket prior to installing that and BAM halfway done. I used plenty of the engine rebuild lube so the first time I crank this thing up it will reduce the initial start up wear. I will get it buttoned down tonight.
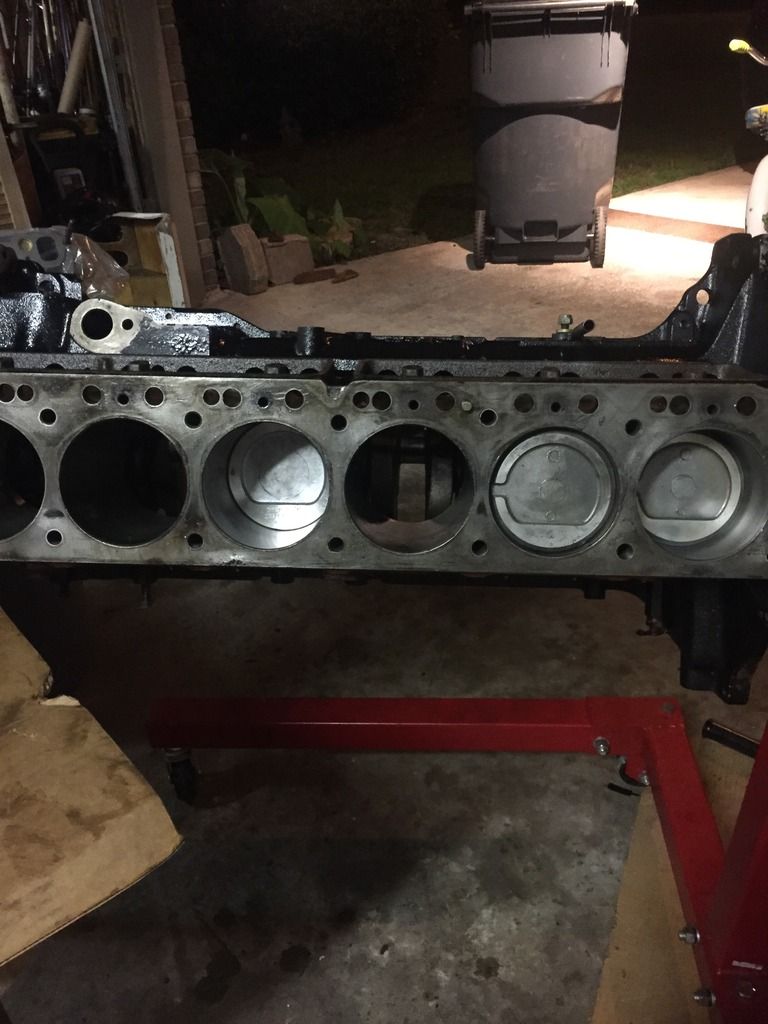
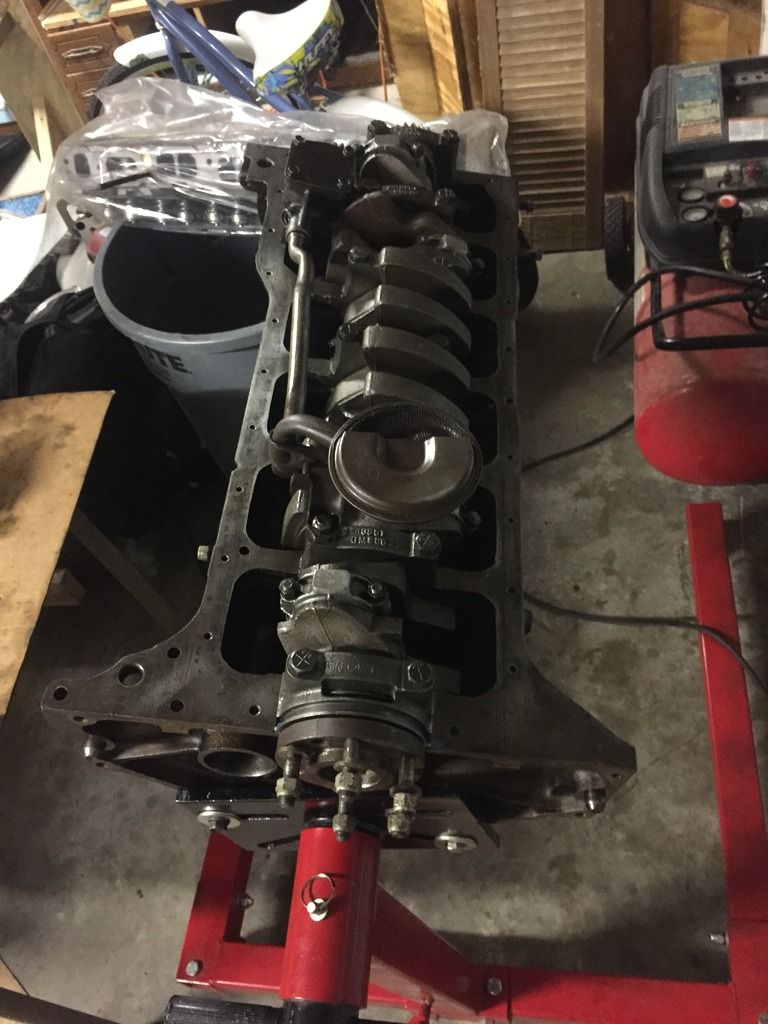
I also got one of the two heads back from the machine shop. It looks good and ready to bolt on. The second one didn't fair to well, it didn't make it through the procedure . Once they started hitting it with an air hammer knocked the rust off there wasn't much left of it so BOAT ANCHOR. I have 3 more heads that aren't in great shape but maybe one of them might work.
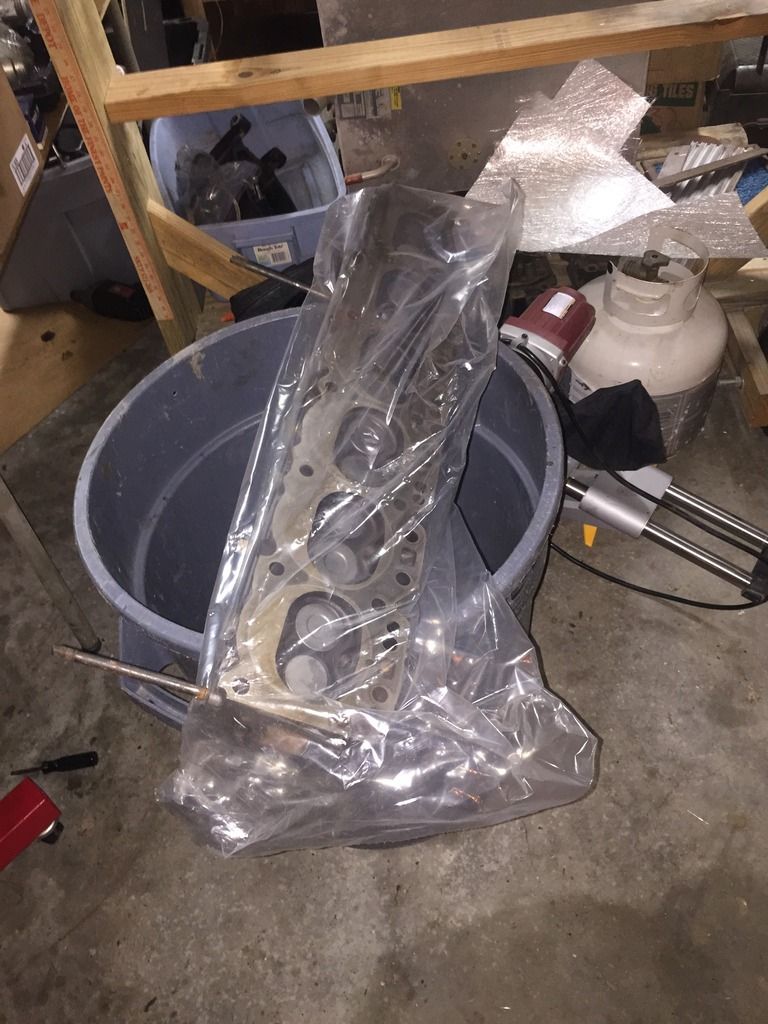


-
-
Doing all this engine work makes me realize how much I had depended on my dad for backup and advise. He came from 2 generations of mechanics and he grew up in his dads garages in Puerto Rico before joining the U.S. Air Force and working on B52's. He was my go to guy. Now I get to just make the mistakes the hard way
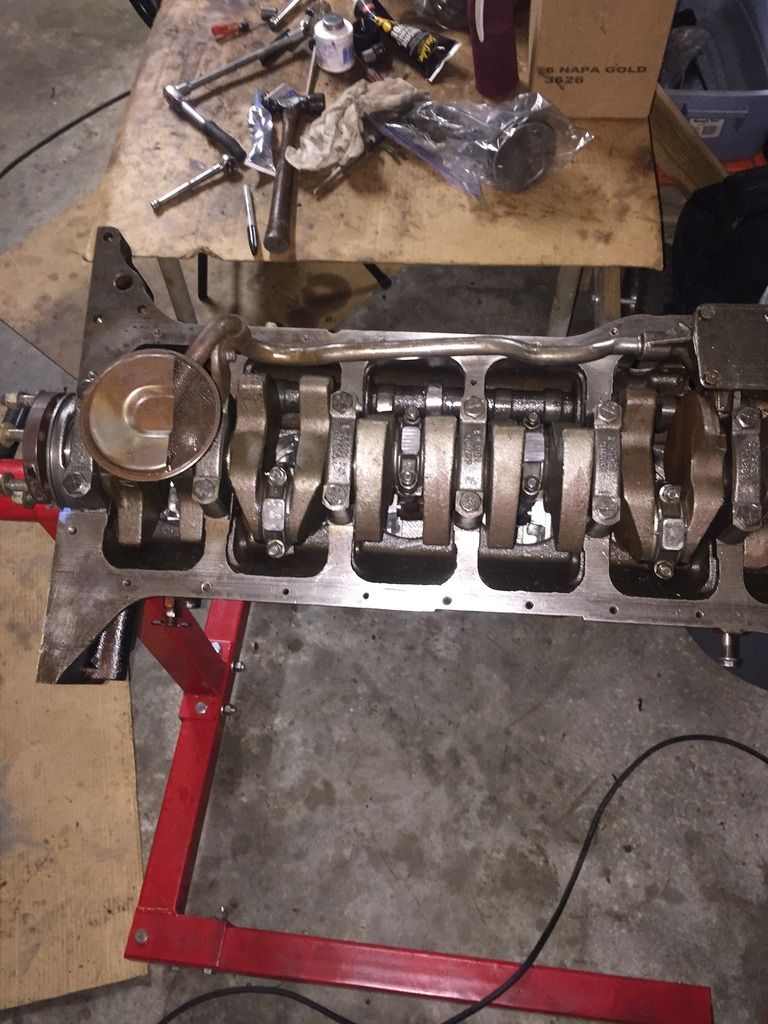
 I did manage to get the rebuilt head on the engine along with rocker arms, lifters and such. The rest of the time I just worked on cleaning manifolds, oil pan, timing gear cover and lifter covers. You forget how many little bits and pieces make up an engine and that all of them are nasty dirty and need cleaned up and or painted before I put them back on.
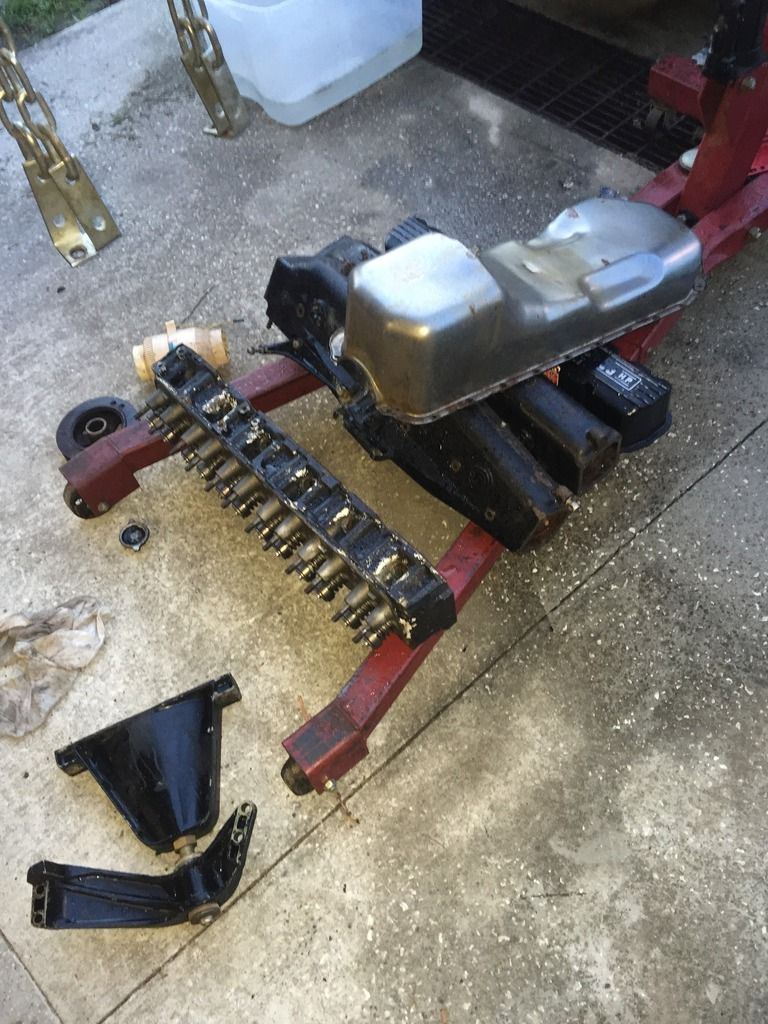


-
-
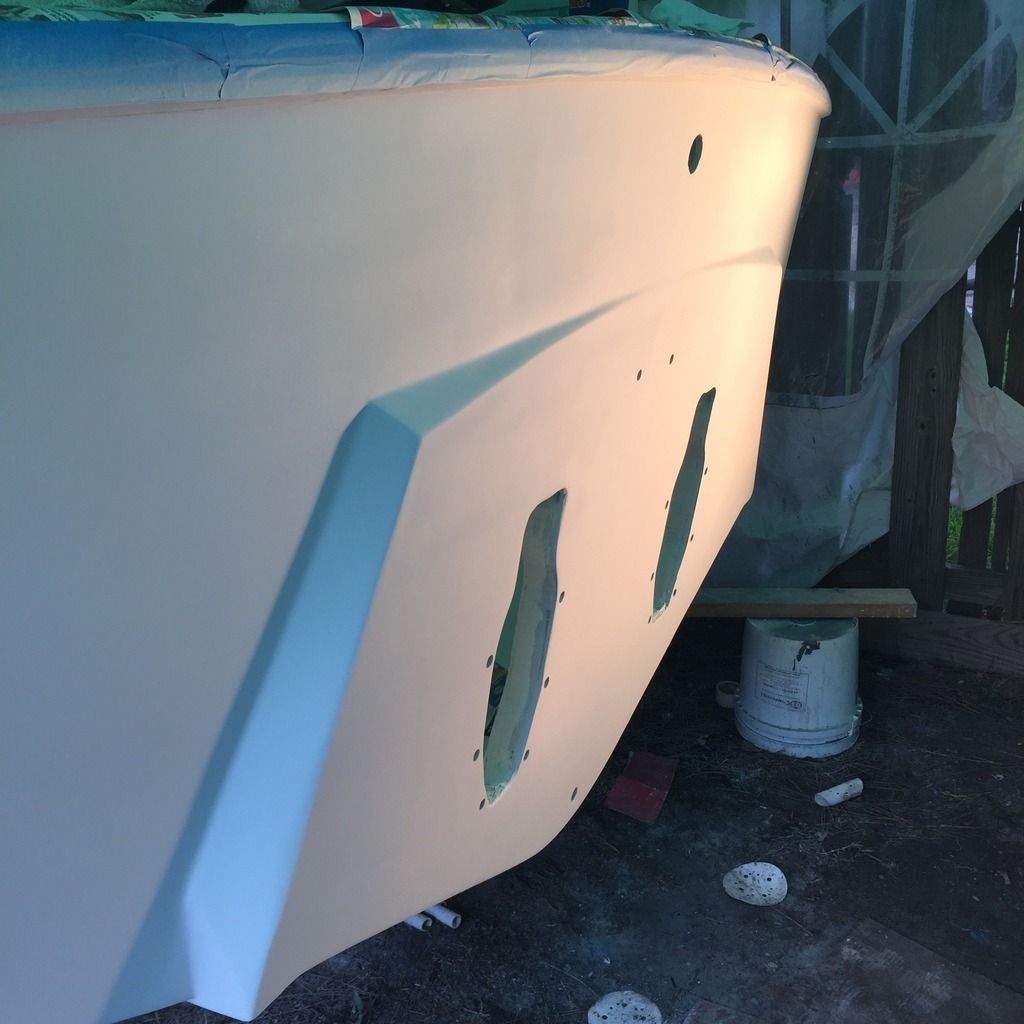
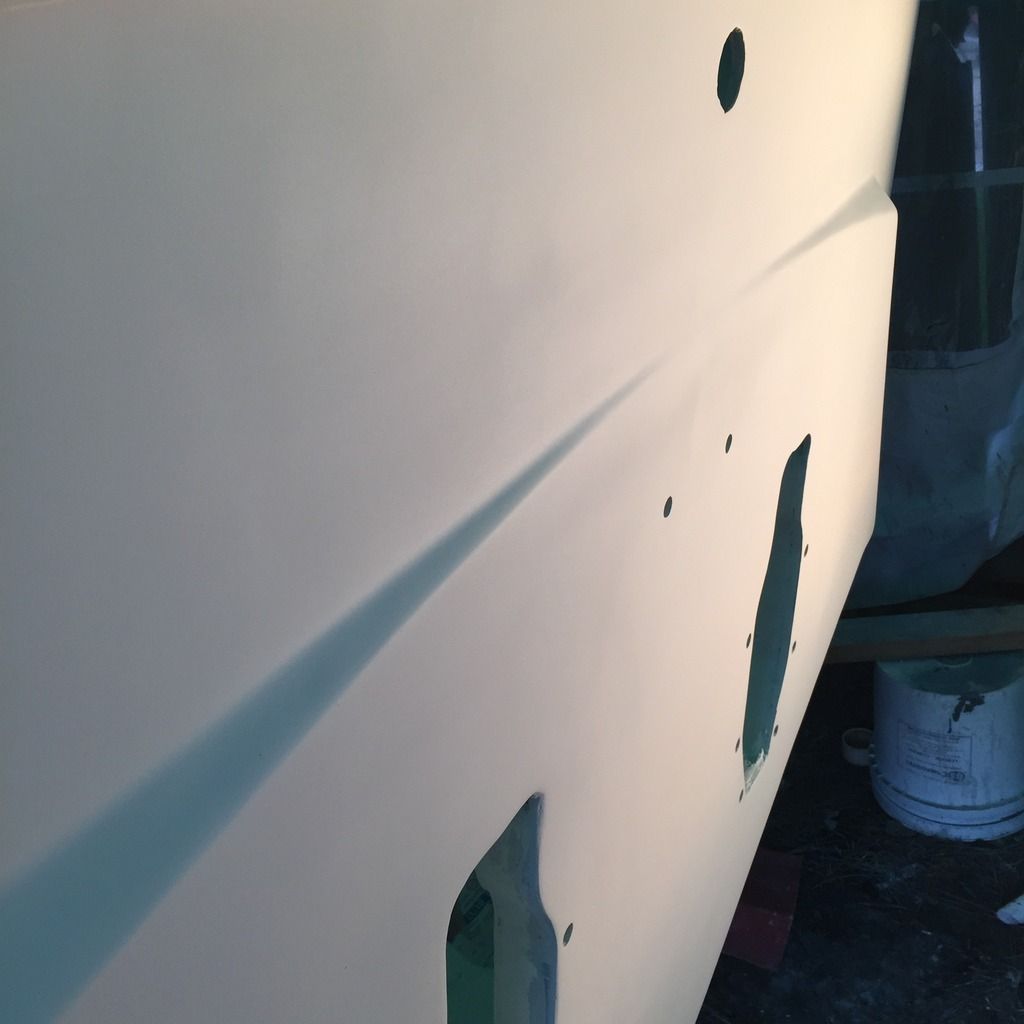
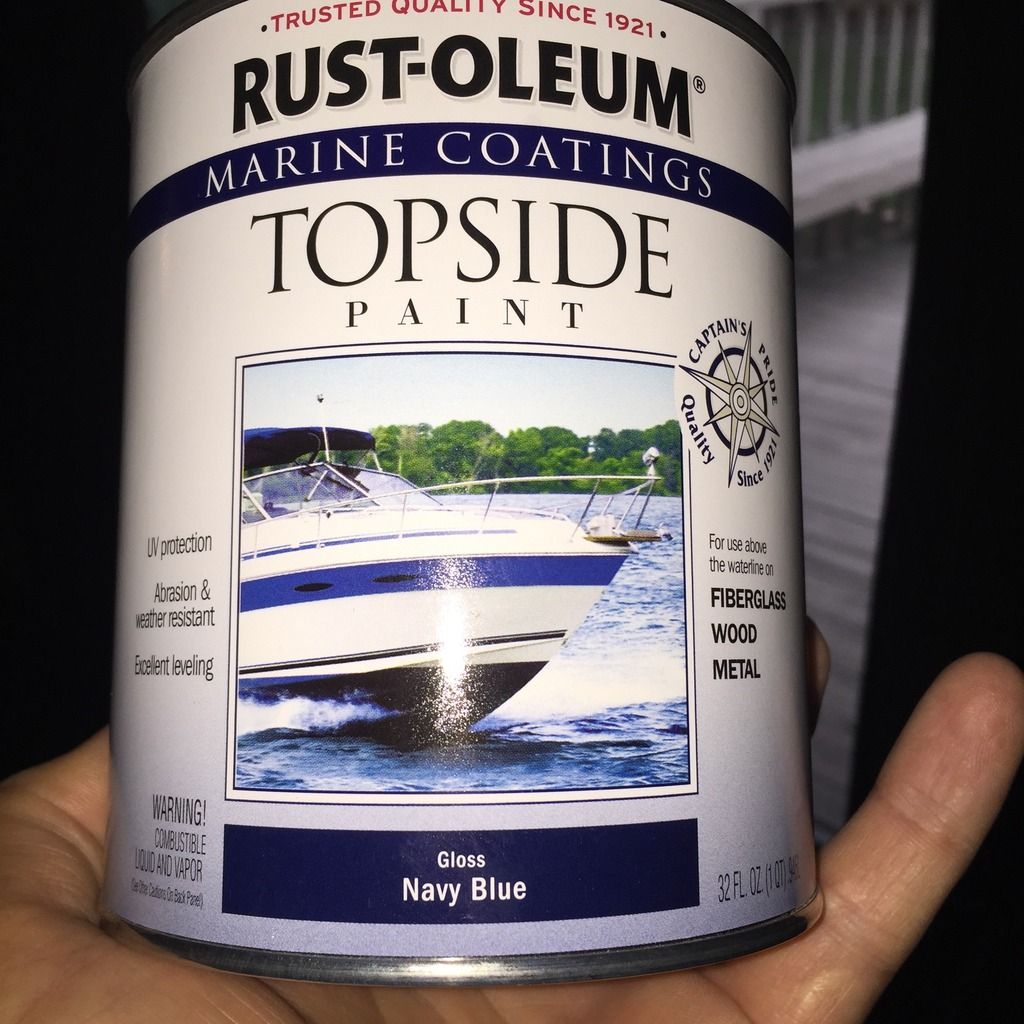
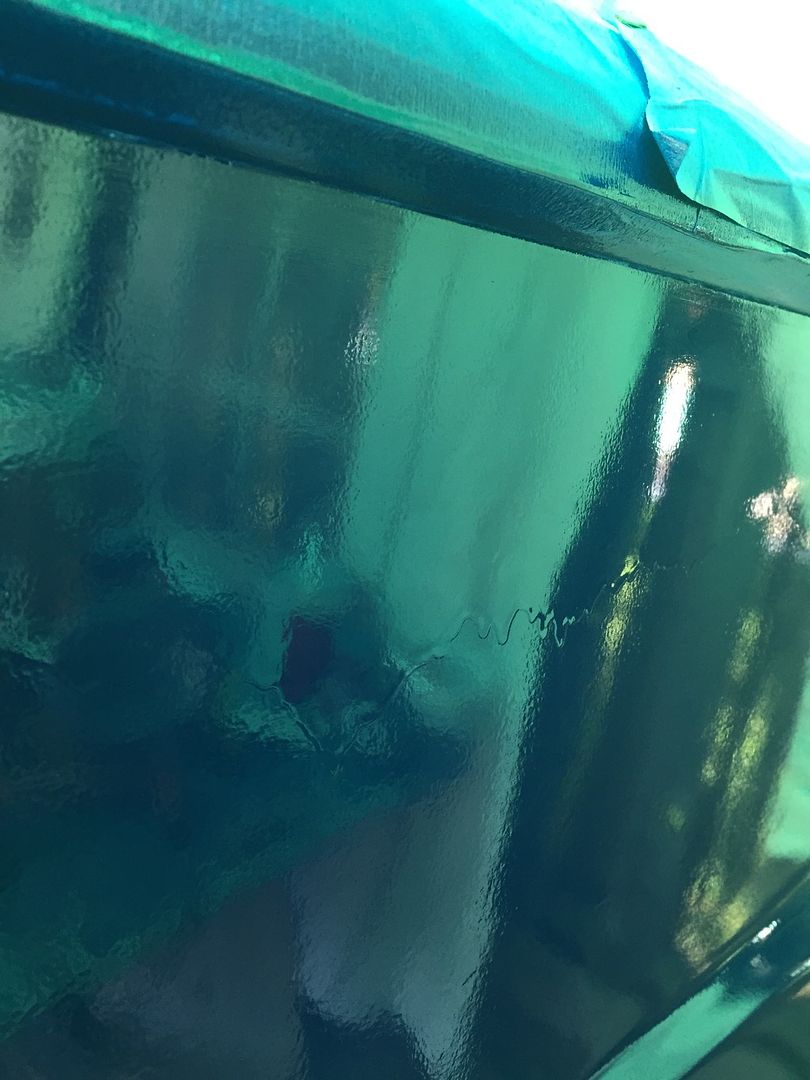
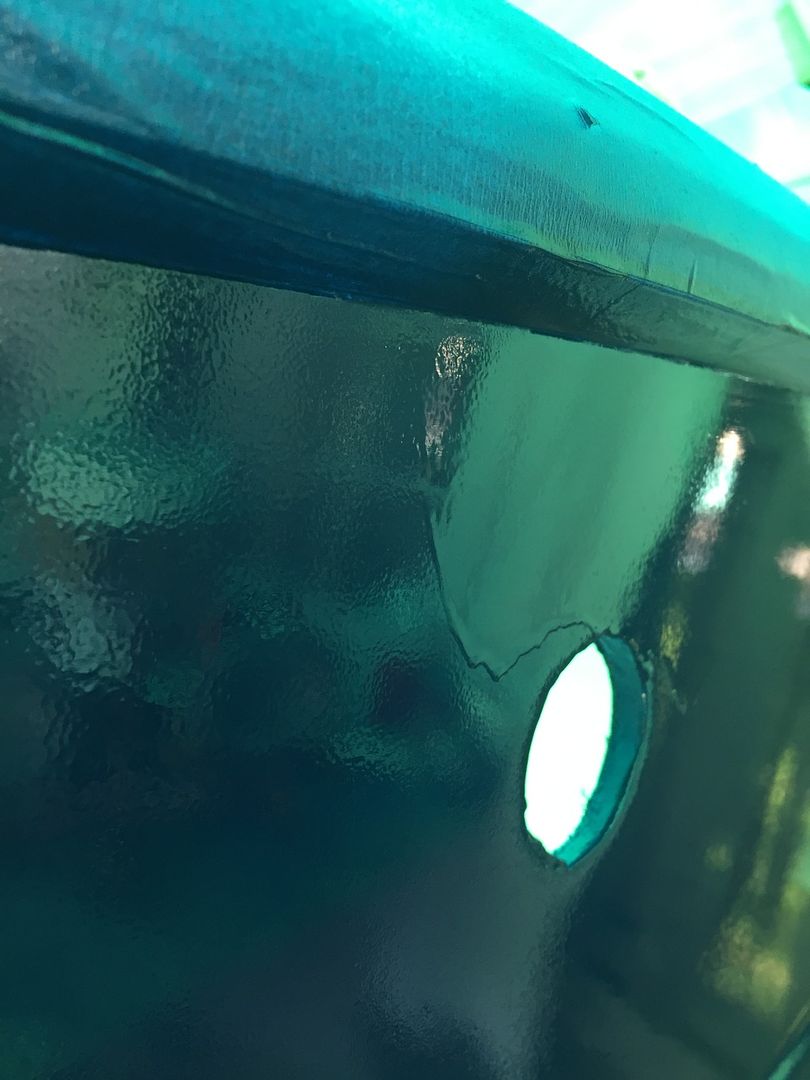
I have thrown this out there before but did not get any responses. Does anyone who has a boat the same as mine 1972 or close Thunderbird Formula 233 still have their capacity plate or sticker. If yes could they attach a picture for me, cover up your HIN though. I have found some companies that can remake the plate they just need a picture of one. Mine has gotten tossed at sometime during the 12 years it set at my fathers house.It's been a busy week but doesn't seem like I got much done. I finally got the transon outer skin smooth and pretty flat. Decided to paint the boat with the tractor paint from Tractor Supply. I am only doing the transom right now so I can get the gimbals mounted and move closer to getting the engines back in. I bought a quart each of the sandable primer, blue paint and clear coat. After prepping the transom I opened the primer and noticed the bottom was about an inch of a thick sludge. My inner cautious voice was telling me bad can of primer don't use it, my impatient voice was telling me just stir and shake it real well and let's get something done. Impatient voice won out and after stirring and shaking the primer, no more sludge, so it appeared to be so I put a coat on the transom. The next day after a good 13 hours it looked good so I went to lightly sand it with 220grit. The papers would gum up and the primer would also gum up on the transom. Diagnosed it as a can of bad primer. My cautious voice gave a little laugh as this truth sank in. So back to the store for a refund because they only had one can left and it was the same way. I went to a big box store and bought a quart of rustoleum primer after I open it and checked for sludge. Then the next question was what about the coat of primer already on the transom well it of course had to go so after about an hour and half a gallon of acetone the transom was again clean and ready for primer. I will get pics and load them soon.I haven't done much on the boat this week. I did sand down the first coat of paint and the more I think about it I may try my hand at painting the transom with a spray gun instead of rolling it. I have all the needed equipment I think and I bought new spray guns a few months ago I am just nervous about trying something new. I did work on the engine a little bit and finally got it off the stand and on a make shift wood stand where I was able to turn it over and do a compression test on the cylinders. Starting from number one cylinder I got 175, 155, 165, 150, 145 and 155. I like the numbers just not the difference between the highest and the lowest. I adjusted the lash on the valves without the engine running of course but I think they may need a little more adjusting. I had a ton of pictures that I was going to post but this week my iPhone died with the red then blue screen of death. I had my contacts and calendar backed up to the icloud but not my pictures darn that cloud.Ok, I have sanded down my first coat of sprayed on paint with a HVLP (High Volume Low Preassure) gun. Didn't turn out to bad and gives me practical practice. Just put down the second coat, was a little easier this time and no runs.I just went back out and inspected my work, it looks pretty good. Consistent all the way across the transom. I hope the color coats turn out that nice. Now once this is dry I guess hit it with a light wet sanding with 320 before I put the first coat of color?Ok trying this from my phone. Here are 3 pics of the transom with 2 coats of primer using the spray gun. Monday I will sand it with 320 and maybe hit it with the first coat of color, Navy Blue.


-
-
Got home and wet sanded the primer with 320. Cleaned up and decided to put a coat of color on it.
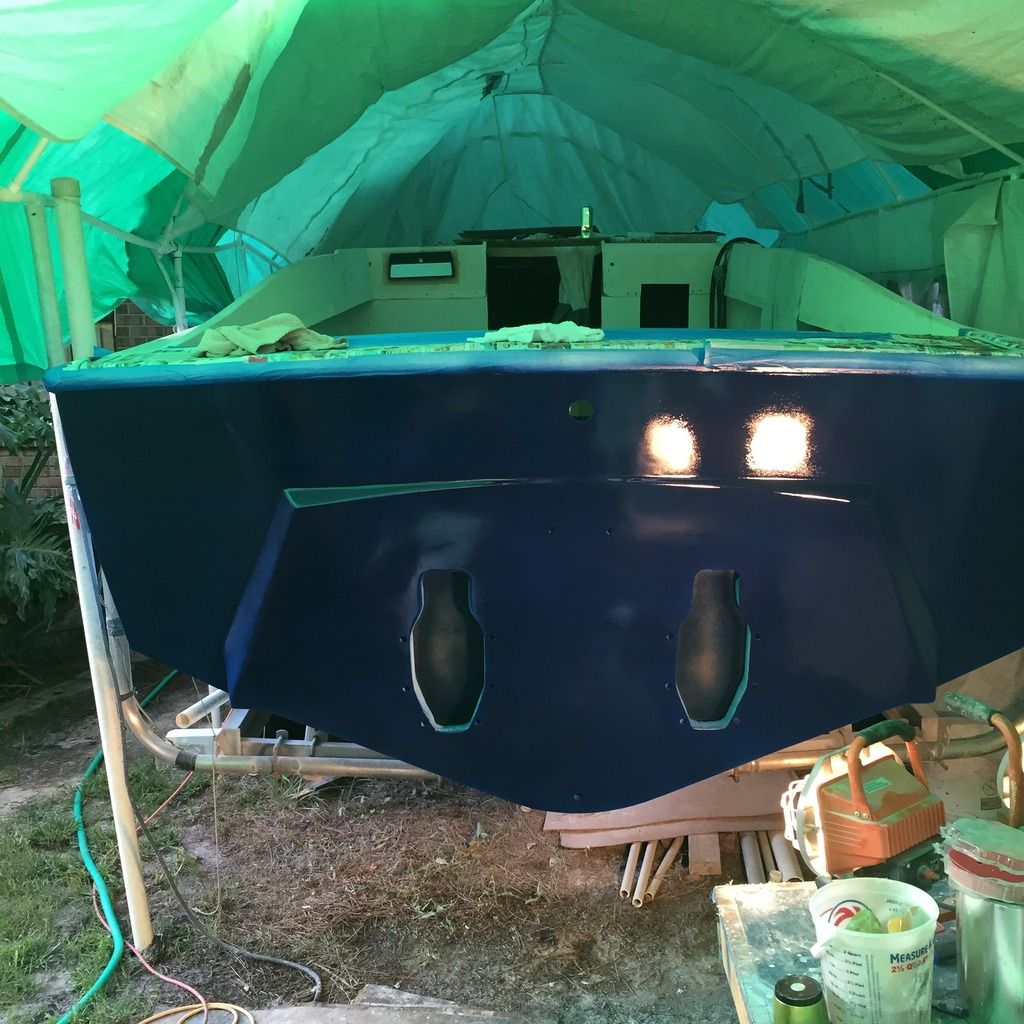

It's only the first coat. But it looks pretty good except a little more orange peel then I would have liked. Anyway I am pretty happy for my first try. No runs, no drips, no errors.Well here is another issue I found last night. Still waiting for the weather to clear up so I can continue with painting so I am back to engine work. When I put the engine block on 2x4s I noticed the rear motor mounts sat over 1 1/2" lower than the front motor mounts. At the time I didn't give it much thought and figured its because its not sitting in the boat so I shoved another 2x4 under the back and moved on to other things. Well Tuesday I went back and looked at the pictures I took during the tear down process last August/September time frame. Take lots of pictures from every angle during tear down and refer to them often during rebuild. I noticed the front motor mount looks different then the one I have on there now. The one I have on there was from one of the donor engines and looks brand new so I used it. I went back through my bins and found the old front motor mounts and as the pictures below show they are way different.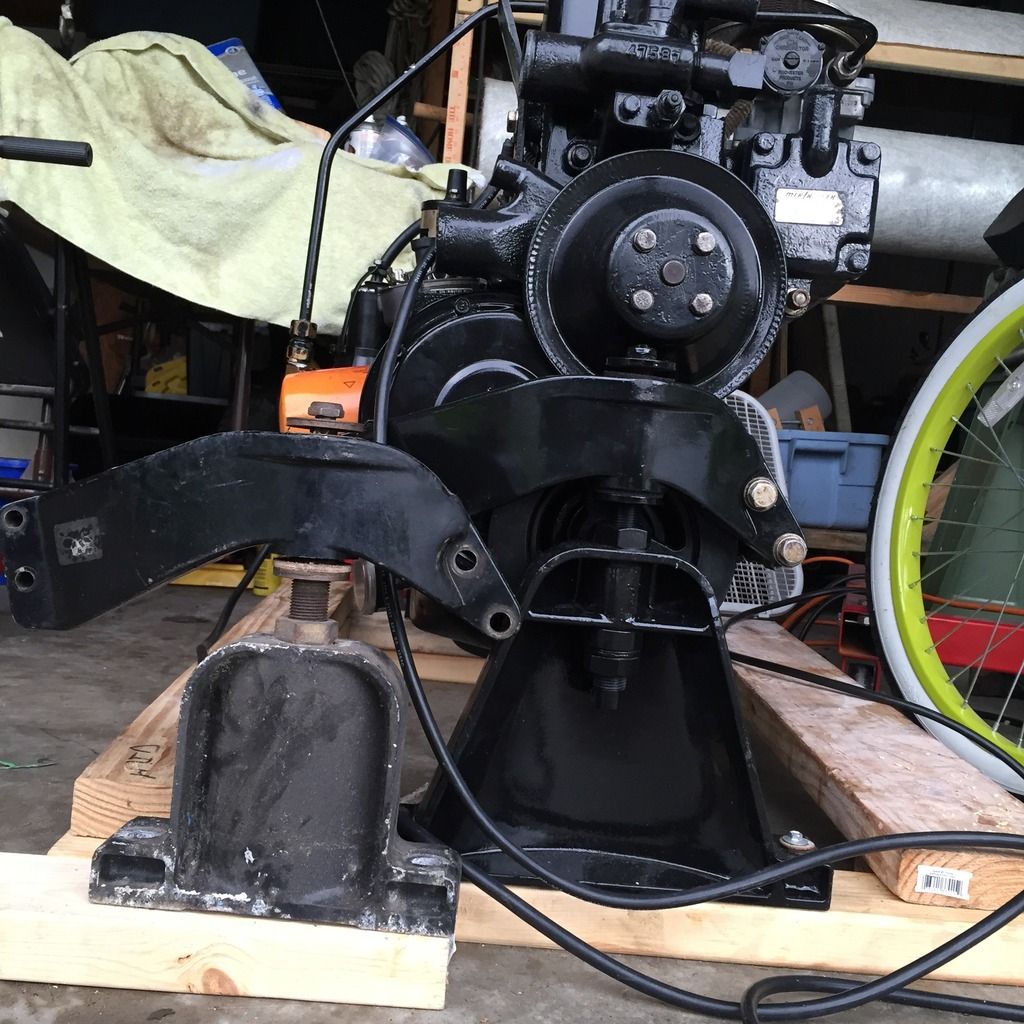
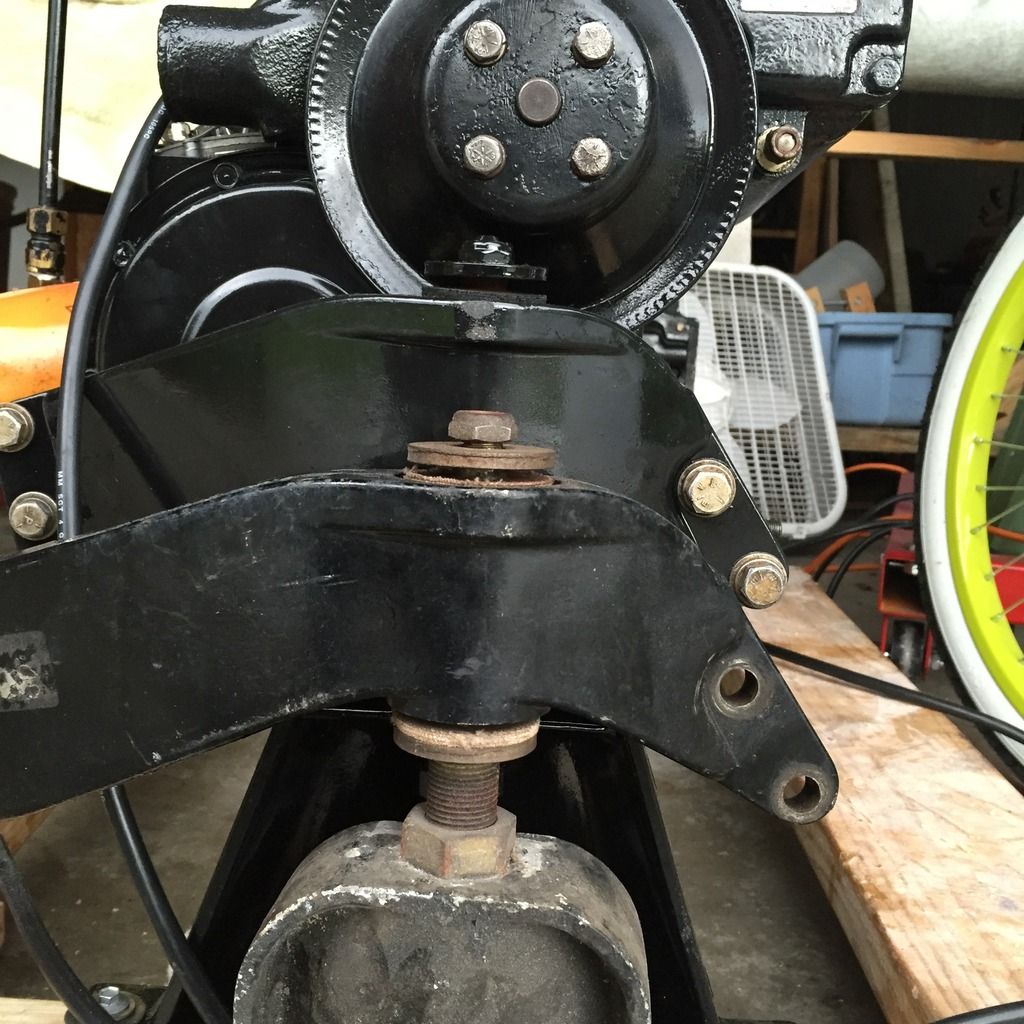
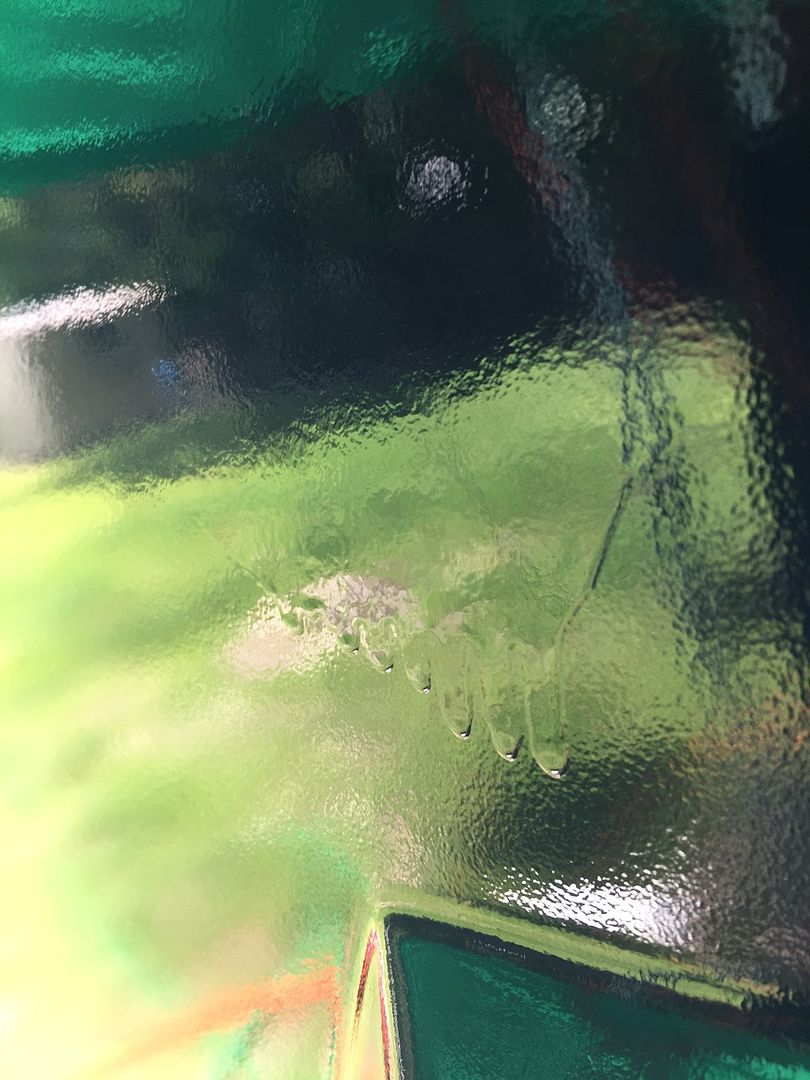
The motor mount in the boat was made using the measurements I took from the old deck and engine mounts so this new one is not going to work. So I guess its time to tear down the old ones and replace some of the worn parts and put a fresh coat of paint on them. I am glad I found this now and not the day I am putting the engine in the boat. Oh well the fun of DIYWell that was a complete failure. Mixed it at an amount of 230ml paint, 150ml reducer, 80ml mineral spirits because it was 91*. 15ml hardener. Let it cook for 30 minutes stirring every 10 min. Setting on the gun was wrong obviously. Too much paint, runs everywhere. It will all have to be sanded down flat again no part of the transom looks good. I don't know what happened, I couldn't seem to get the adjustment right. Covered a large piece of card board with spray doing test spots and pattern but couldn't get it to adjust right. Not happy right now. Seems like another week wasted. 1 step forward 3 back. I hate boats right now.Here is the cardboard. .
.
And the runs if you can see them in about 10 different spots.


-
-
Not much going on with the Formula 233. I corrected the front motor mount issue and adjusted it to the correct height.
This weekend I will sand down my messed up transom paint job and give it another shot. Besides all the runs and drapes I like the color and it looks smooth. Can't wait to get a clean coat on it.Not tackling this right now but I need to work on it before I paint anymore of the boat. The old aluminum rub rail. It has seen better days but I don't want to replace nearly 70 feet of rail. Something in the range of $400 plus. Nor do I want to take out an estimated 209 bolts plus any rivets.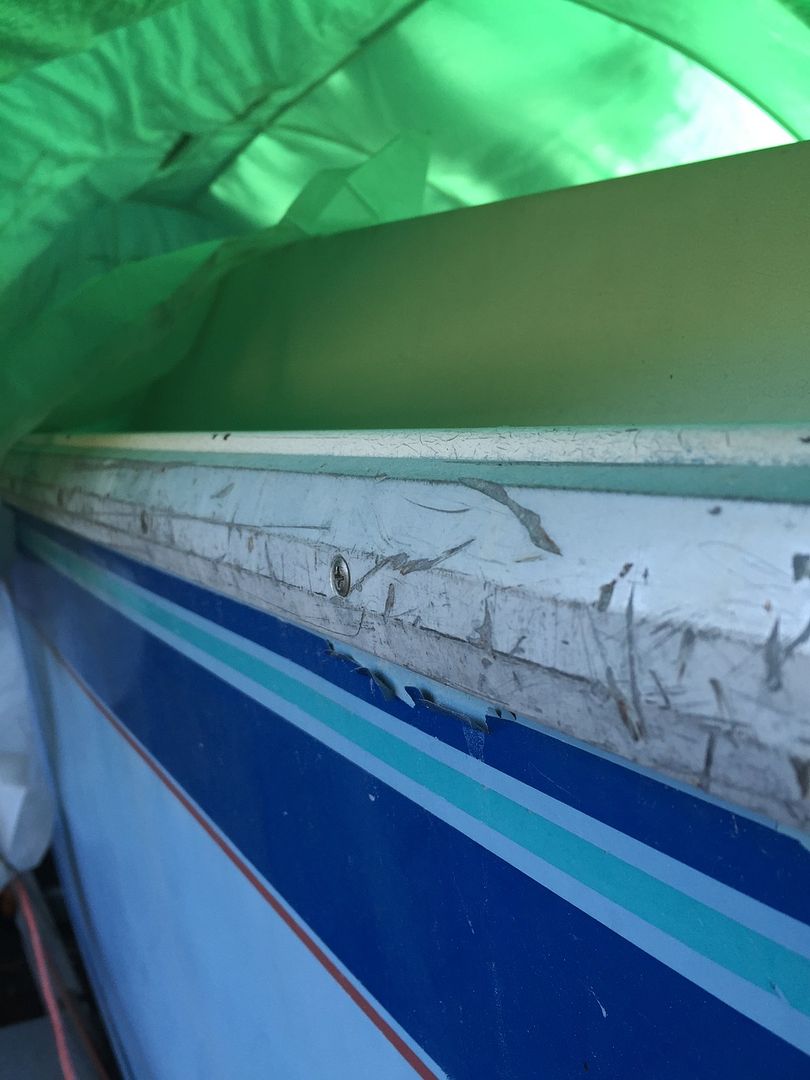 Ok wet sanded the drapes and runs and adjusted the gun and so far so good. Turned out it was both the gun adjustments and the paint mix.
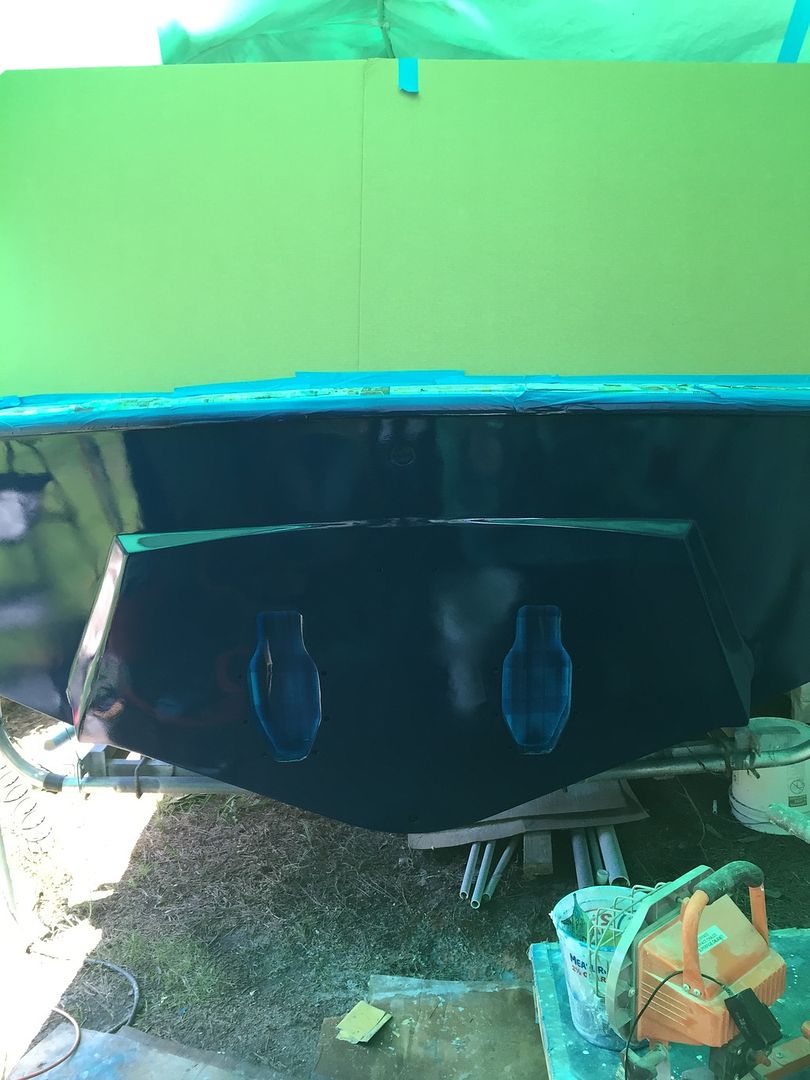
Orange peel but no runs.


-
-
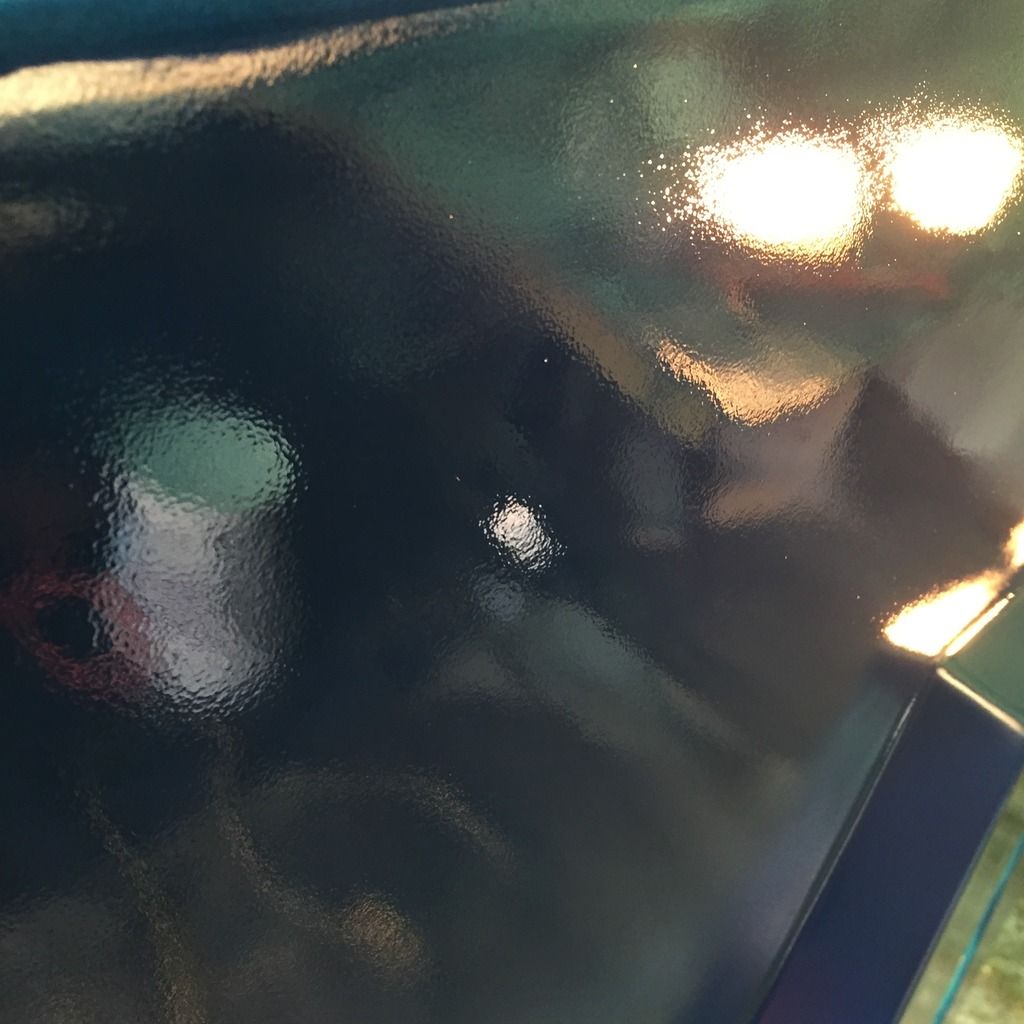
It's been a couple of hours and it is dry to the touch and smoothed out a little more. Took another picture so you can see right after the paint was sprayed
and 2 hours later This is the gun I am using. 1.4 tip.
Running it at about 35psi at the gauge in the gun. This is the compressor I have.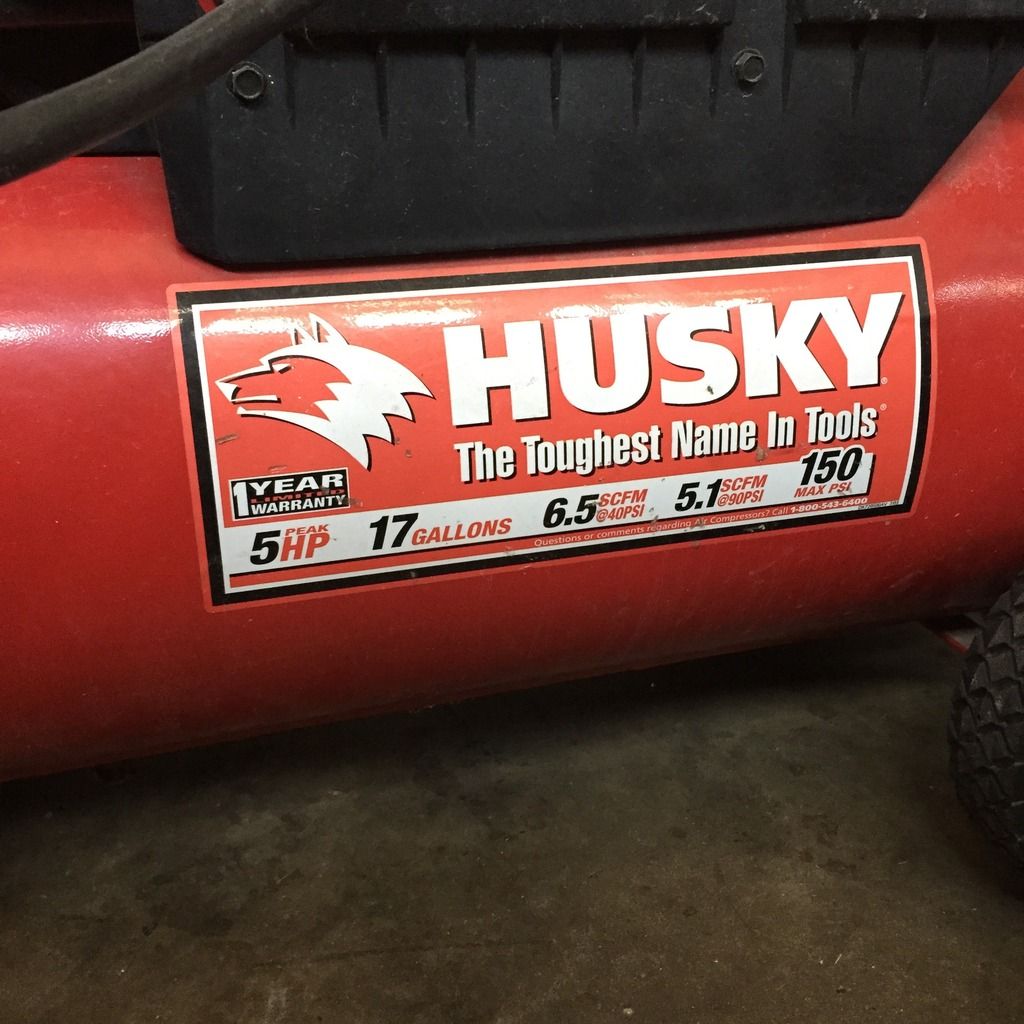
The paint is a Rustoleum boat topside paint. I have been using acetone and mineral spirits for reducer. I think this next shoot I will lower the psi just a little, turn the paint volume in just a touch.I am working on the console piece as a side project. I filled in all the old holes using a fairing compound with a lot of 3M Glass bubbles. I gooped it on heavy but this stuff sands off very easily.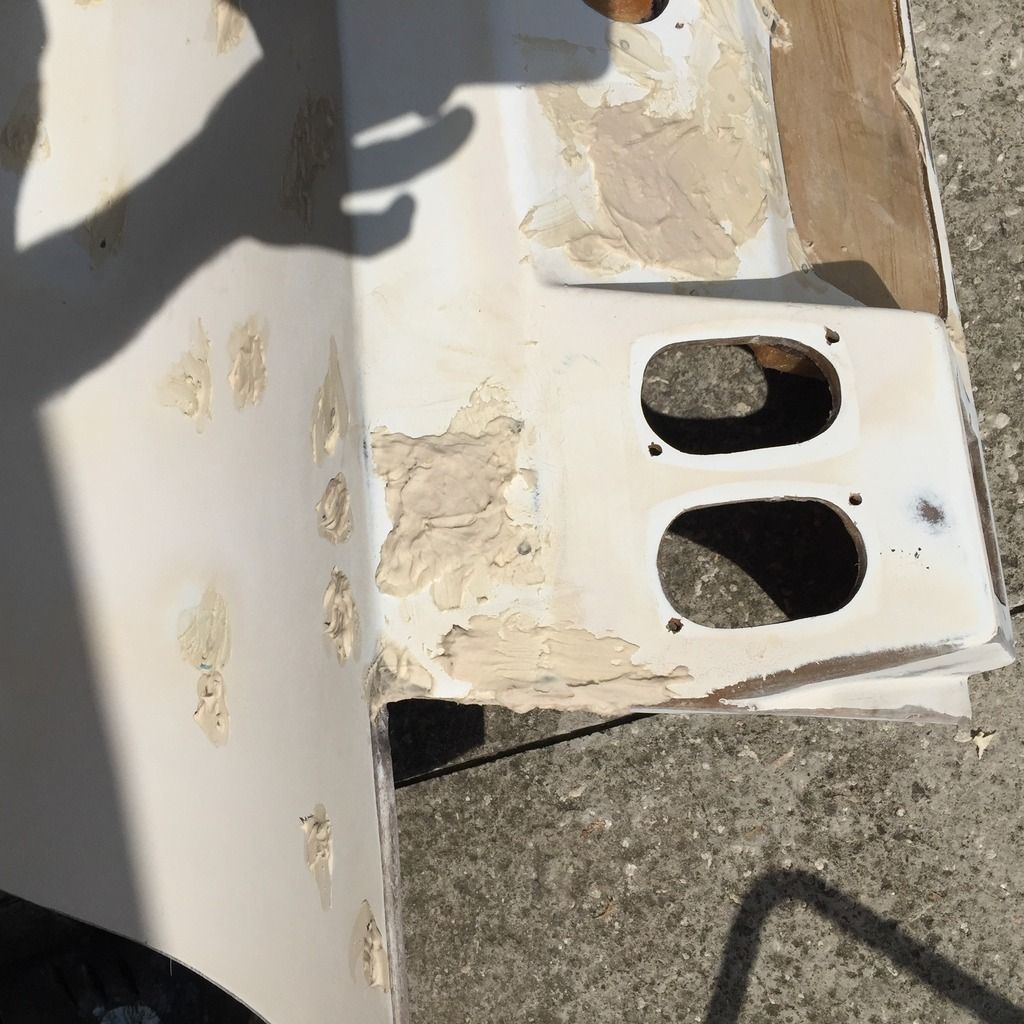
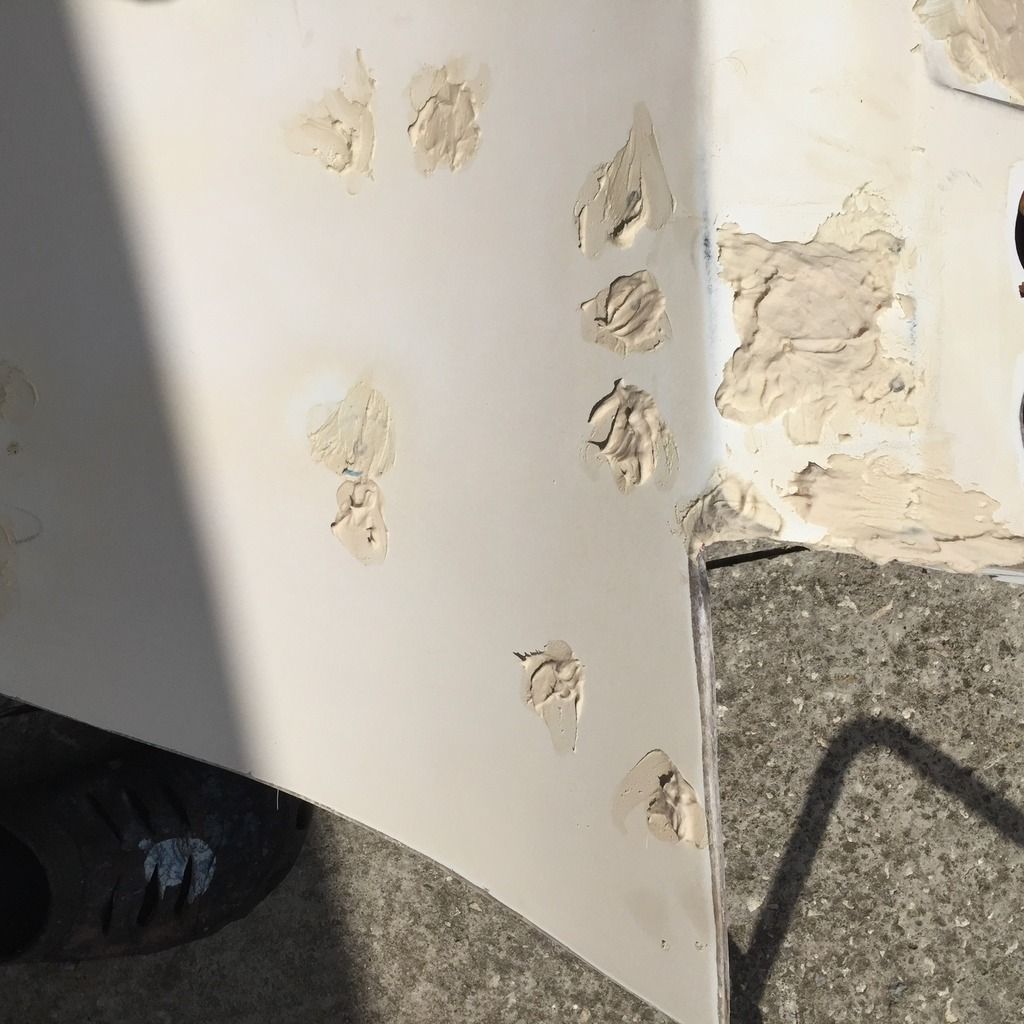
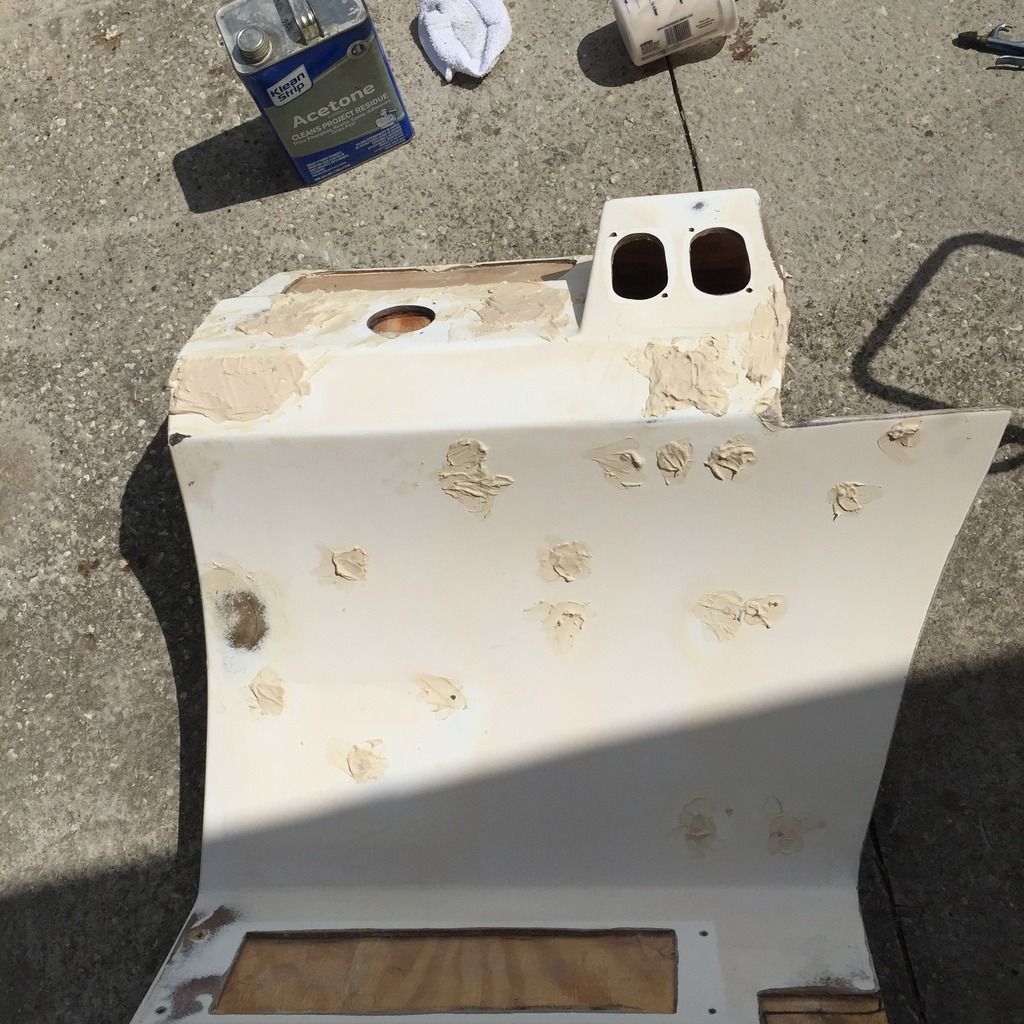
I also put new 3/4 or 1/2 ply behind the console. The gauge cluster was mounted on a piece of plastic and I haven't decided how I want to put them back. Maybe a piece of white starboard. I don't know yet. To patch all the little holes and blemishes I mixed small batches of resin and 3m glass bubbles to a creamy paste. Easy to spread, fills small pin holes good and best of all it's easy to sand off.Ok done with shooting another coat on the transom. To me it looks pretty good.
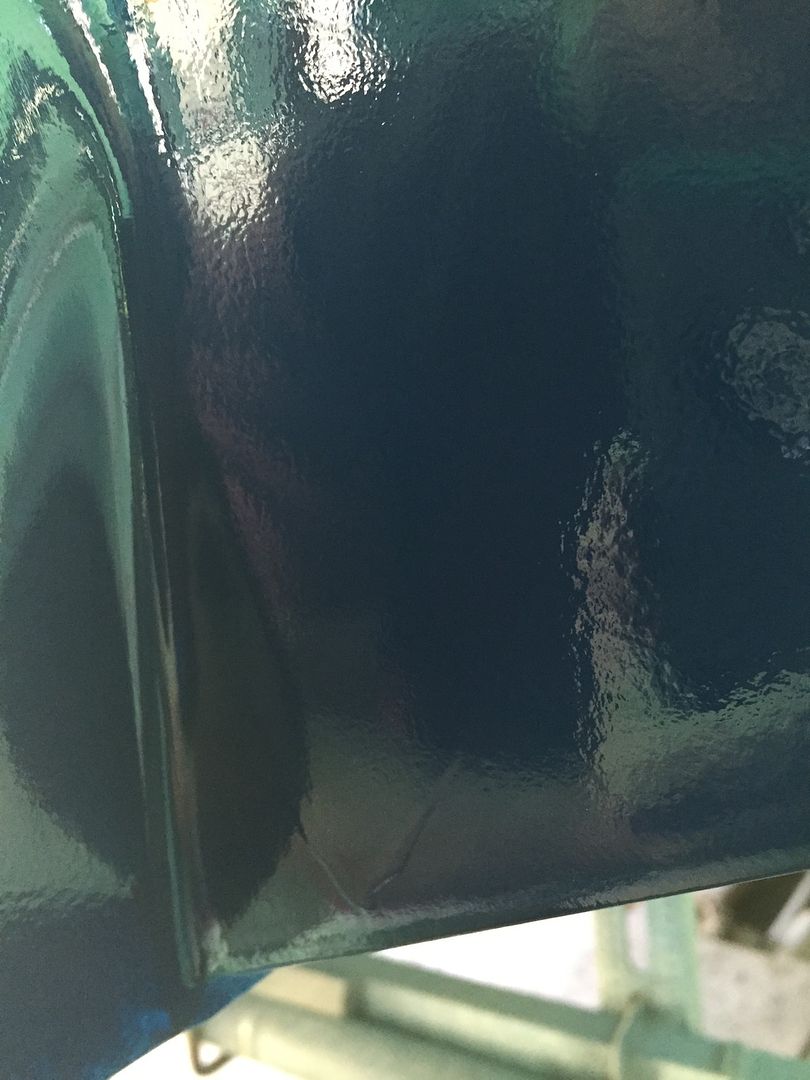
Orange peel look is a lot less and no drips, runs or drapes. After it dries I may put one more coat on it because a few spots sanded down and showed the light gray primer. -


-
-
Nothing much going on with the boat but I just realized it's almost a year since I started my restoration last July. Wow that year flew by. I hope to have it splashed before the end of this year.I am still working on the boat hitting several different areas, my A.D.D. is kicking in and I cant stay focused on one thing
 so I guess I will just update everything I can remember.
I decided to go ahead and paint the white part of the transom before I attach the transom brackets.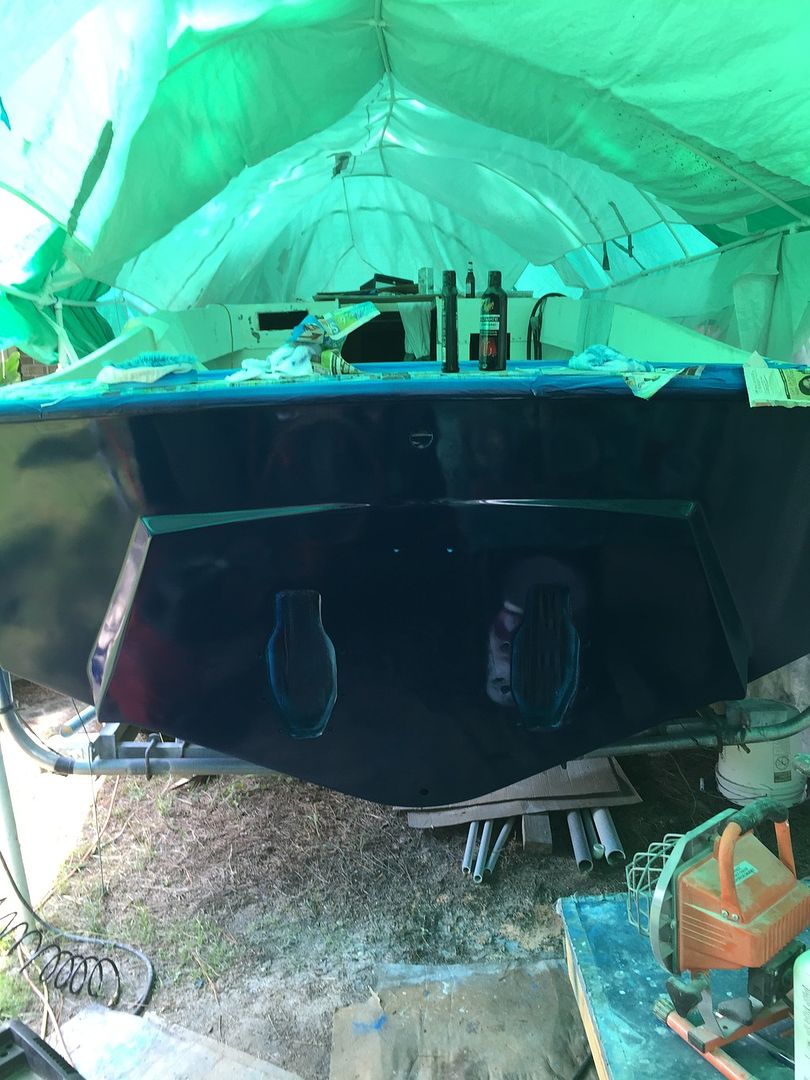
Made an estimate of where the waterline will be and taped it off. Scuffed up the paint and cleaned it with a mix of Acetone & mineral spirits.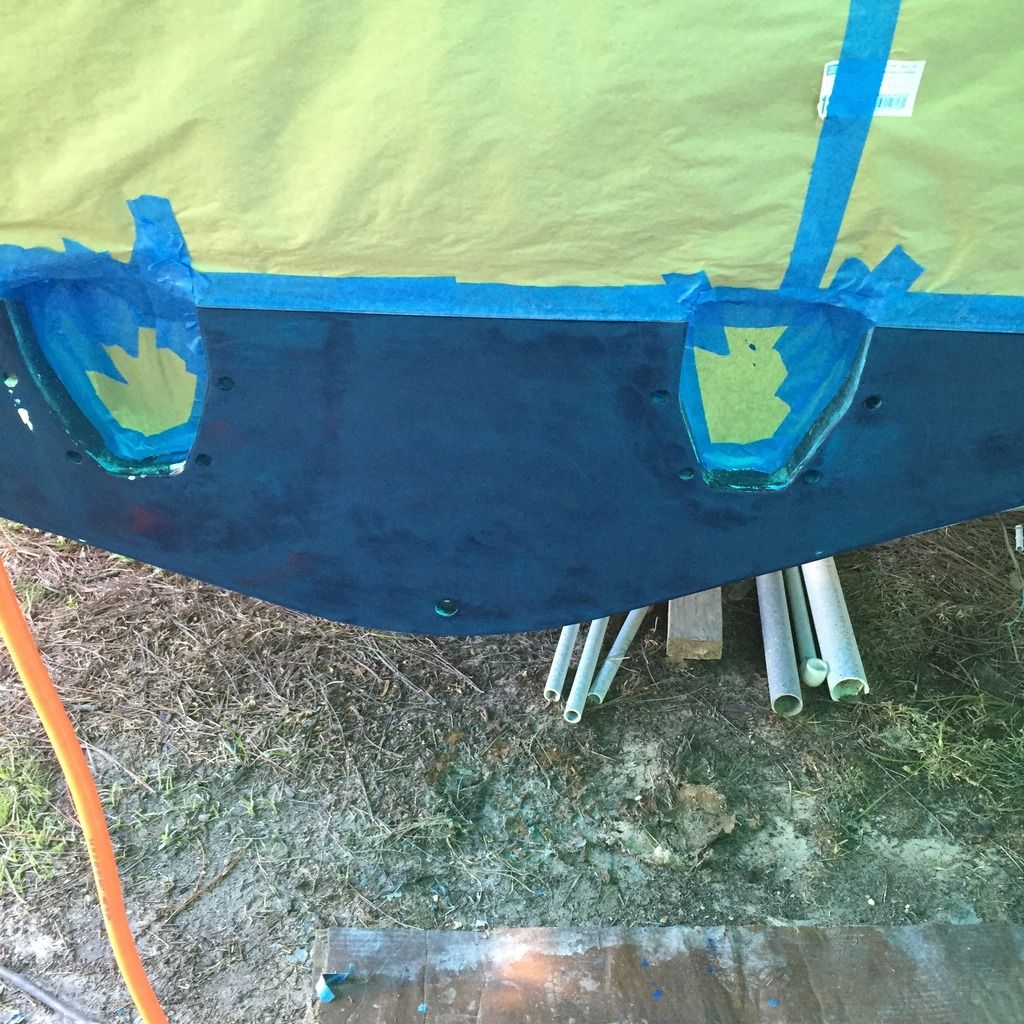
Hit it with the same type Rustoleum boat paint this time in Gloss white. It went on very easy with no issues this time.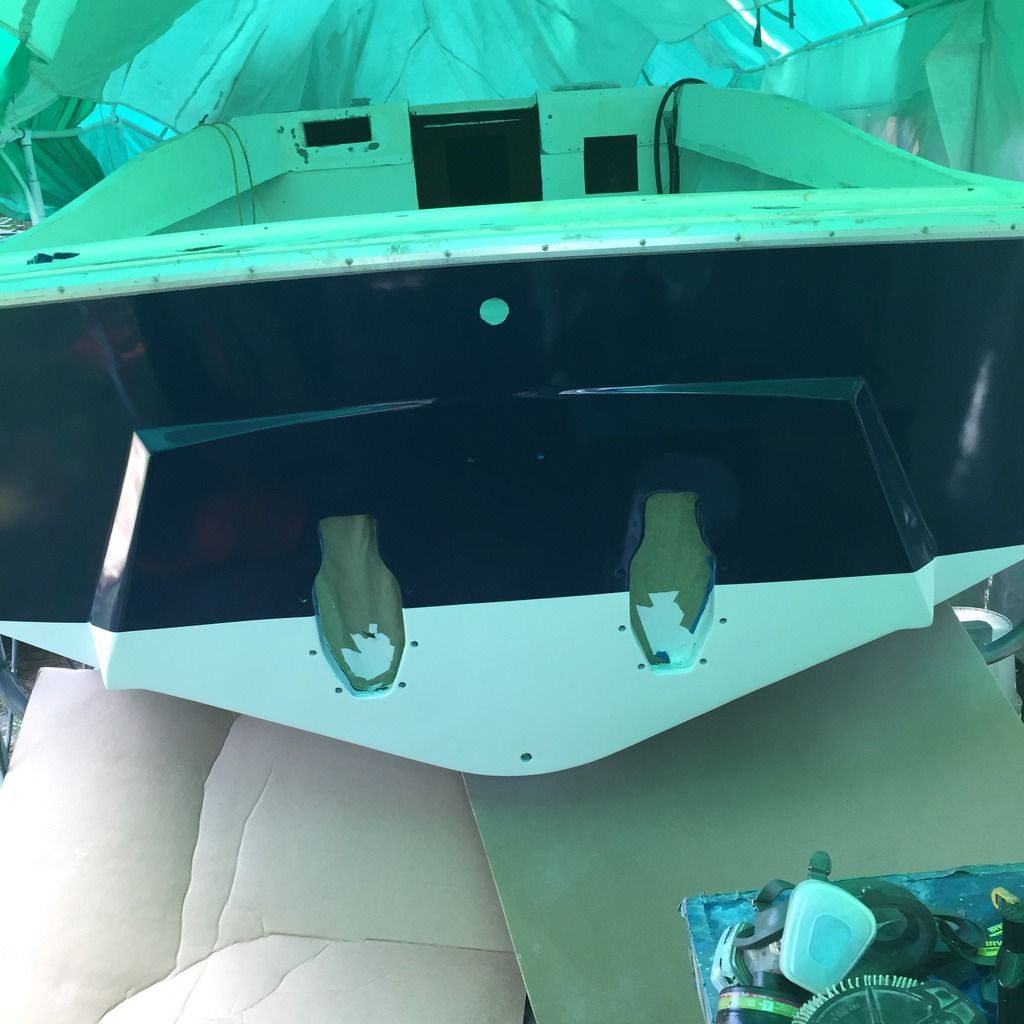


-
-
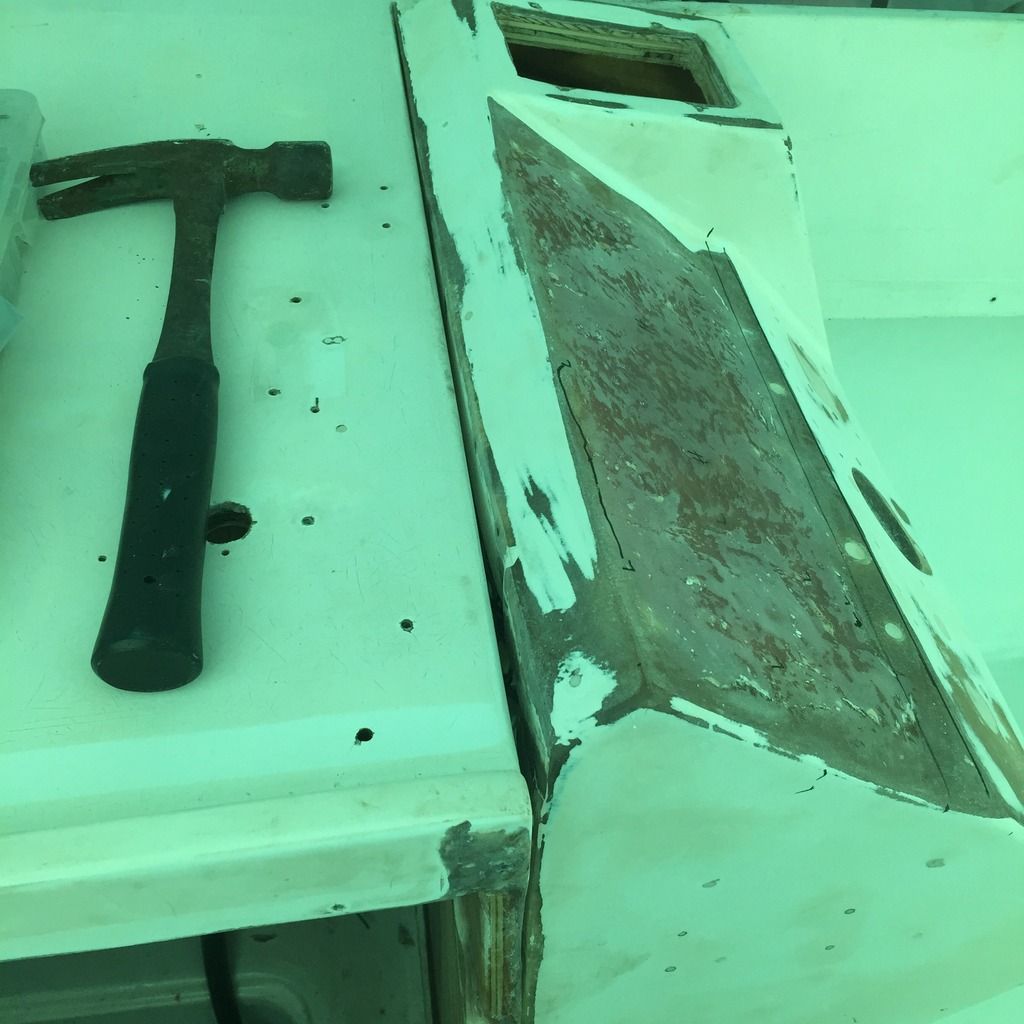
I realized I hadn't over sized all the bolt holes in the transom wood so I drilled out the transom from the inside with a one inch drill bit all the way to the fiberglass transom skin and back filled with PB. I put duct tape on the outside and made sure nothing protruded past the outside skin since I didn't what to have to grid or sand it flat messing up my paint. I should have done this prior to painting. After it set I drilled out the bolt holes with about a 1/2" drill bit so now even if water gets into these areas it wont come in contact with the transom wood just the hardened resin. I had already done the bilge drain this way when I first put the transom in. No pics of this process.I have continued to work on the console. Patched up the multitude of old holes and prepping it for painting.
It doesn't look like it in this picture but all the tiny blemishes have been filled and its nice and smooth except the space where the gauges console will ultimately be installed. Here I am trying to fit it back into its home. Since the deck height is just a touch higher, maybe 3/8" I am having to do some cutting and sanding to fit. The one spot to the bottom right still needs Fiberglass cloth to fill in that section.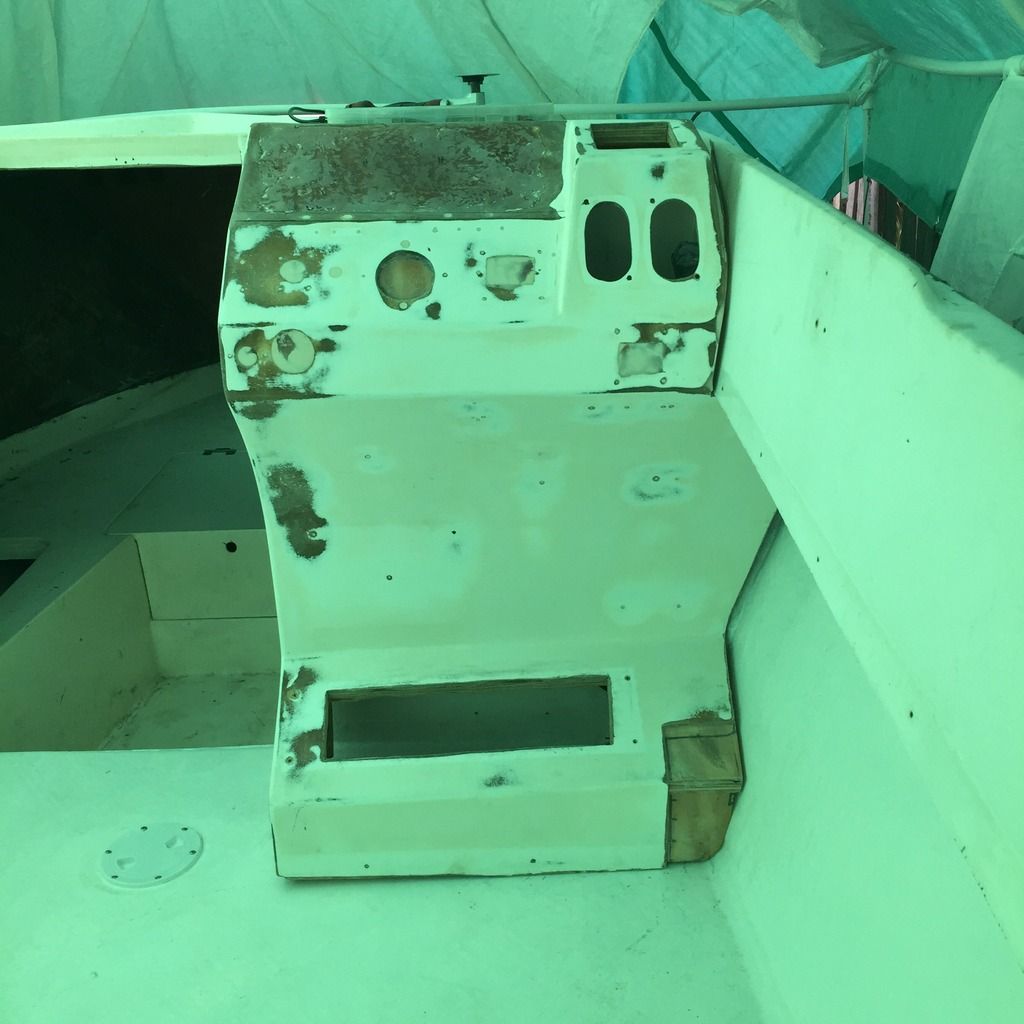
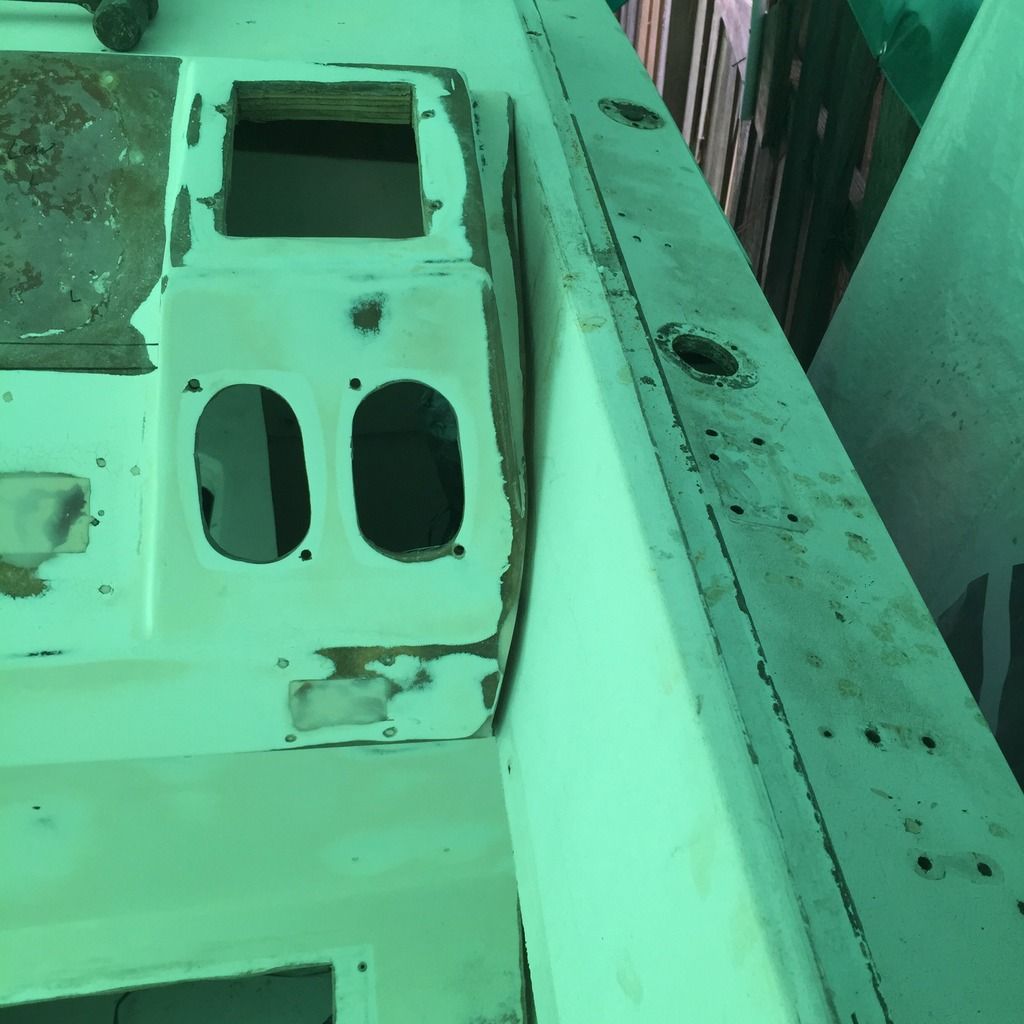
The rough area will be covered by a piece of Black Starboard and the gauges will be installed into the starboard. Here is a piece of scrap wood cut the size of the starboard with simulated gauges in place trying to get the layout correct.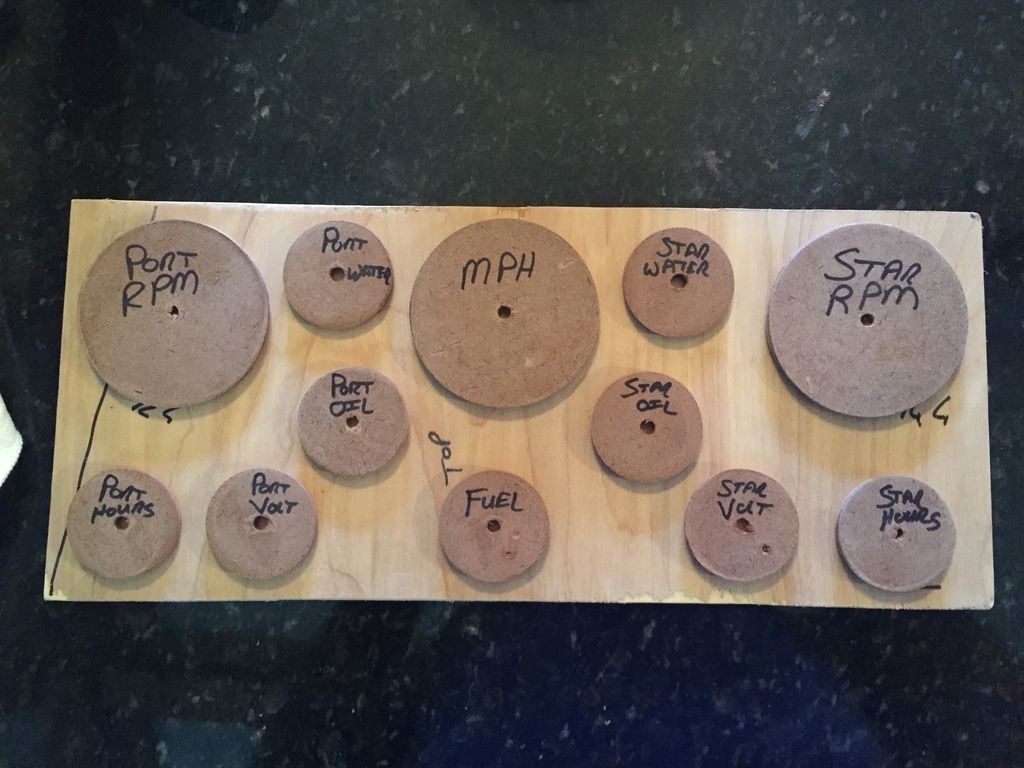


-
-
After I painted the white part of the transom the Admiral came out and told me how nice the paint job looks and how crappie the old metal rub rail looks. I finally had to admit that the rail needs to come off so I started trying to remove the approximately 200 bolts holding it on. Some of the bolts would just snap because they have been on this boat for 43 years, others the nuts were so corroded I couldn't hold them and after a while I just decided to cut them loose by using my oscillating saw and cut the bolt just inside of the nut. Some of them are hard to find because they are under fiberglass. Here is a picture of my first attempts using Vise grips inside while trying to unscrew them from the outside.

The rub rail is very heavy aluminum in 4 pieces. One big piece across the transom and wrapping forward about 6 feet, one big piece wrapping the bow coming aft about 8 feet or so and then two smaller straight pieces on either side about 6 feet long. Once I removed the rails I was glad I did. The seal between the cap and hull is dried out or non existent towards the back plus it was nasty under it and it will be much easier to tape this area off and paint between the Gloss white cap and the dark blue sides. My first plan was to replace the rub rail with a newer version that is black rubber with the white rope insert but after looking at this rail and how heavy duty it is and how it has survived 43 years I decided to restore the old railing. I haven't messed with restoring old aluminum so I didn't know what results I could end up with. I took one of the small pieces last night and started experimenting with it. I started with the sander and 60 grit to smooth out the deep scratches and gouges. Then 220 on the sander. Then wet sanding with 320, 600, 1000, 1500 grit. I then switched to the polisher using compound polish then polisher. Wow did it come out looking awesome. This will take me about a 1/2 hour per foot and I have about 60 feet but it will be worth saving the original rub rail and not having to spend $500 plus for a new one that wont last.


-
-
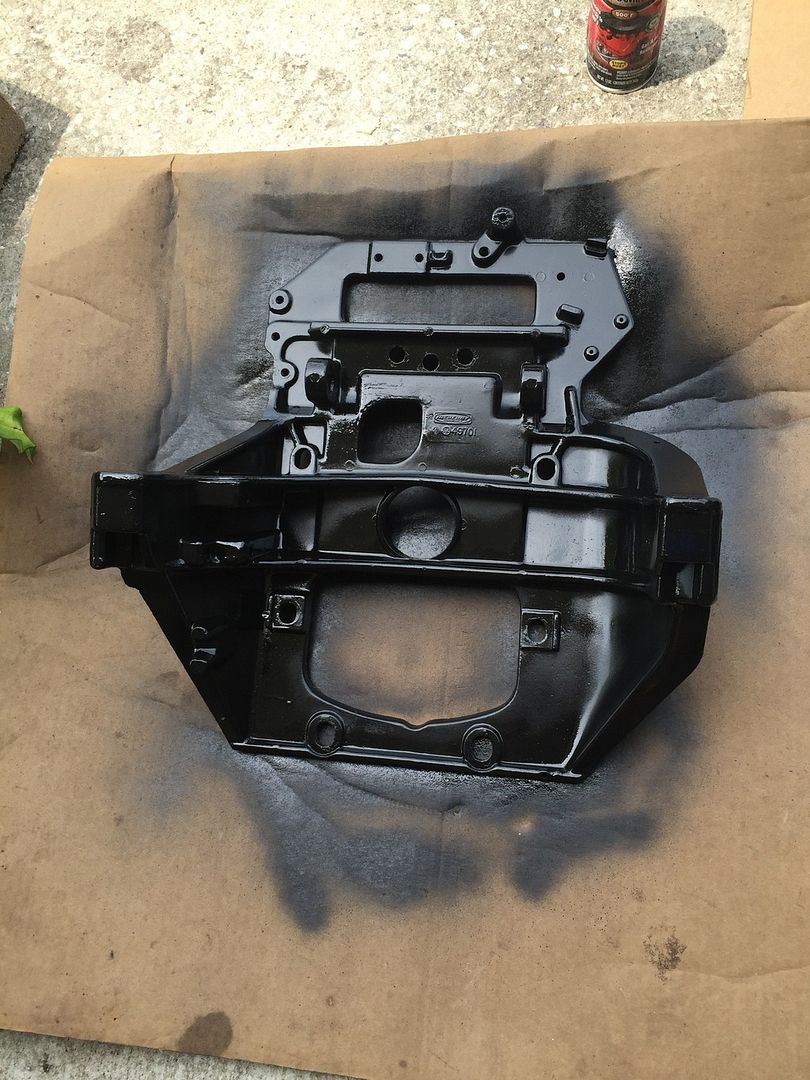
I have also painted the inside transom plate and the outside Gimbal housing. I striped everything off of them, sanded them down, put several coats of primer and then wet sanded smooth before putting several coats of black paint on them. I don't have any pics of the Gimbal housing but both are done and ready to put back on.

© 2024 Created by David.
Powered by
![]()